Garden paving is an increasingly popular way for Kiwi homeowners to create stylish, low-maintenance outdoor living spaces. The mild climate in much of New Zealand makes it possible to enjoy garden patios and pathways year-round. Paving enables gardeners to have accessible spaces free of mud, weeds, and mess.
This article provides an overview of best practices for installing garden paving in New Zealand. We'll cover important considerations like climate, drainage, materials, patterns, edges, maintenance, costs, and safety. Following these do's and don'ts will help ensure your paved space is functional, durable, and enhances your garden's beauty. The goal is to equip readers with the knowledge needed to successfully pave a garden area that will provide enjoyment for years to come.
Consider your local climate when selecting paving materials and patterns. Choose durable options for hot, dry areas; non-slip pavers for cool, wet regions. Allow proper drainage for weather conditions.
Main paving material choices are concrete (affordable, durable), stone (attractive, weather-resistant but expensive) and brick (visually interesting, classic look but requires maintenance).
Match the paving pattern (running bond, basketweave, radial, etc) to the patio shape and overall garden look. Simple patterns suit small spaces.
Install edging along borders to contain the pavers and delineate adjoining lawns or planting beds. Choose durable concrete edging for high-traffic areas.
Create adequate drainage with a gravel base, sloped ground, drainage gaps and pipes to prevent water pooling on the pavers long-term.
Sweep sand from joints, use polymeric sand, apply herbicide and hand pull weeds to stop unwanted growth between pavers.
Costs vary based on materials, amount of paving, professional vs DIY, site access and excavation needs. Get quotes.
Follow safety codes and best practices with non-slip materials, proper drainage and slope, railings, lighting and ongoing maintenance.
Maintain pavers by regularly sweeping, washing, re-sealing, controlling weeds and making repairs to keep them looking their best.
New Zealand has a very diverse climate that varies greatly between regions. This is an important factor to consider when selecting paving materials and patterns for your garden.
The North Island has a subtropical climate in the far north, with warm humid summers and mild winters. The central North Island is drier with more extreme seasonal variations. In the South Island, a cooler temperate oceanic climate dominates, with moderate rainfall spread throughout the year and colder winters with frost and snow, especially in inland and alpine areas.
With these regional differences, some paving materials will be better suited than others. Hot, dry regions like Northland and the Central Plateau will benefit from robust materials like concrete and natural stone that won’t crack. Cooler southern and alpine areas should choose non-slip pavers for safety. Composite materials like wood plastic composite (WPC) don't handle frost well. Porous pavers may work in some areas but not others.
Proper installation is also key for durable paving. Allowing adequate drainage, avoiding freeze/thaw damage, and preparing a solid base will all help your paving withstand the unique conditions of your local climate long-term. Consider consulting a professional paving contractor for recommendations specific to your region.
When it comes to choosing paving materials for your garden path or patio, you have several options to consider: concrete, stone, and brick. Each material has its own advantages and disadvantages.
Concrete is one of the most common and affordable paving materials. It's durable, weather-resistant, and available in a variety of colors and finishes. Concrete is easy to install and requires little ongoing maintenance. However, it can be prone to cracking over time and has a tendency to show stains.
Pros:
Cons:
Natural stone like bluestone, granite, and travertine creates an elegant, upscale look for garden paths and patios. Stone stands up well to weather and wear. It's naturally slip-resistant. However, stone is more expensive upfront and requires re-sealing periodically. Irregular stone patterns can make for tricky installations.
Pros:
Cons:
Clay brick pavers have old-world appeal and visual interest. Their smaller size allows you to create intricate patterns. Brick stands up well to weather and wear with proper installation. However, clay brick can crack or chip over time. Mortar deterioration in joints also requires periodic maintenance.
Pros:
Cons:
By weighing the pros and cons of concrete, stone, and brick, you can determine the best paving material for your garden landscape needs and budget.
When selecting a paving pattern for your garden path or patio, there are several layout options to consider depending on the size and shape of the space.
For small, rectangular spaces like a path leading to a shed, a simple running bond pattern is best. This involves laying pavers in a staggered brickwork pattern for a classic look.
For larger square or rectangular patios and courtyard spaces, a basketweave pattern adds visual interest. Pavers are laid in a grid pattern with each row offset by half a paver width in alternating directions.
Circular or curved patio spaces suit a radial or fan pattern. Pavers radiate out from a central point like the spokes of a wheel. This helps guide the eye and complements the shape.
For organic freeform patio shapes, a random or crazy paving pattern works well. Pavers are laid in an irregular non-repeating pattern which complements the lines.
Larger open patio areas can incorporate decorative inlays like circles, stars or diamond shapes. Use a contrasting color paver or material like tiles for the inlay.
Take care not to make the pattern too complex for small spaces as this can look busy. Simple is best for narrow paths. Test layout options with loose pavers first before permanently installing.
Consider the overall style and geometry of your garden to select a paving pattern that complements both the hardscaping and planting beds. This creates a cohesive design.
Edging creates clean, finished borders around garden paths, patios and driveways. It helps contain the paving, preventing it from spreading out or sinking. Edging also keeps adjoining surfaces, like lawn or planting beds, from encroaching on the pavement.
There are several edging material choices:
Concrete edging provides a sturdy border that will hold its shape. Pre-cast concrete strips can be installed along the edges. Another option is pouring a narrow concrete curb directly on site. Concrete edging is very durable but is also the most expensive option.
Plastic lawn edging is easy to install and affordable. Different styles are available, from thin spikes poked into the ground to thicker plastic boards. While plastic edging won't last as long as concrete, it can be replaced when needed. Look for UV-resistant plastic edging.
Steel garden edging provides a strong border. Metal strips can be installed along the paving edges, hammered into the ground. This type of edging won't flex or degrade like plastic. However, steel edging can become corroded over time and will need periodic painting.
Laying bricks, pavers or stones end-to-end creates an organic, softer-looking edge. This type of edging integrates well with informal garden designs. Individual pieces may settle or shift over time and will require occasional maintenance to keep the border straight.
Dense hedging plants, packed closely together, can act as a living garden edge. Plants like boxwood, liriope or lavender make attractive borders next to paving. This is a softer look that provides visual interest and color. However, plant edging requires regular trimming and pruning to keep it contained.
The edging material should be chosen based on the overall garden style, budget and maintenance considerations. High-traffic areas may benefit from sturdier concrete edging, while garden beds can use softer plastic or plant edging. In all cases, edging helps finish off a garden path or patio by defining the edges and keeping the paving looking crisp.
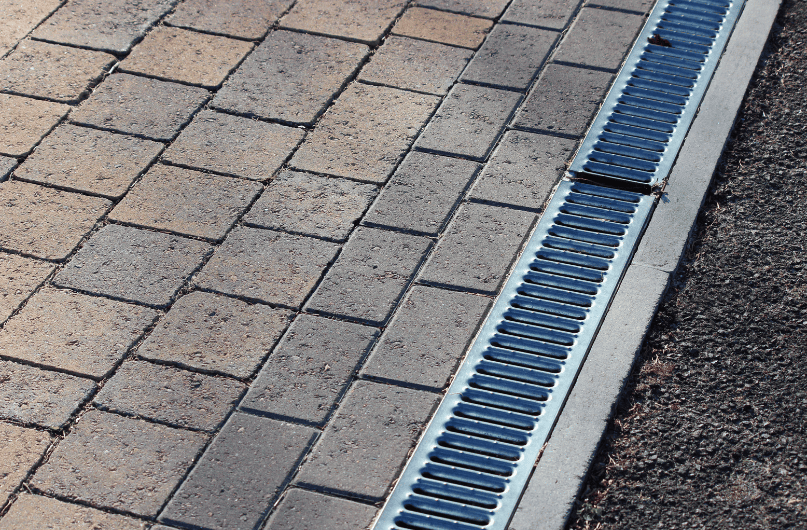
Proper drainage is crucial for a long-lasting and functional paved garden area. Water pooling on pavers can lead to erosion, weed growth in cracks, and slippery conditions. Effective drainage directs water away from the paved surface into surrounding garden beds or storm drains.
There are a few key steps to ensure adequate drainage for garden paths and patios:
Slope the ground beneath the pavers to direct water flow. A 2-3% slope or grade is ideal. Dig lower areas or trenches near the edges to catch water runoff.
Install a gravel base under the pavers to allow water to seep between cracks. Use layers of coarse gravel over landscape fabric for the best drainage.
Leave open joints between pavers to channel water. A joint width of 2-3mm is typical. Use jointing sand to allow water through but keep weeds out.
Extend the paved area over soil or lawn edges. This prevents water from pooling at the edges and underneath.
Connect drainage pipes under the pavers if needed. Pipe water away from the foundation towards garden beds, street drainage, or rain tanks.
For patios, include drainage gaps between slabs and use weep holes. This prevents standing water and hydrostatic pressure.
Adequate drainage is a crucial part of the substructure and preparation. Following these tips will keep your garden paving free from flooding issues and enable it to last for decades. Proper drainage makes the paved space fully functional and usable year-round.
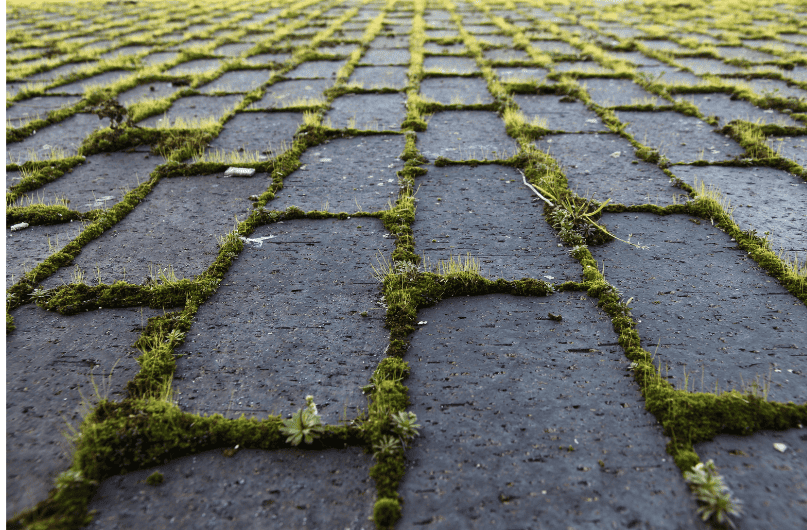
Keeping weeds out of pavement joints takes vigilance but is important for an attractive, orderly appearance. There are several strategies to prevent and remove weeds:
When installing new paving, make sure to thoroughly sweep all sand and soil away from the joints. Any organic material left behind will allow weeds to germinate.
Use a polymeric sand specifically designed for paving joints. The polymers in the sand will harden when wet, forming a barrier and preventing seeds and roots from penetrating.
Routinely apply a pre-emergent herbicide on bare pavement joints to stop weed seeds from sprouting. Reapply as directed on the product label.
Hand pull small weed seedlings when they first appear before they have a chance to establish deep roots. Use a screwdriver or weed popper tool to remove the entire root.
For more established weeds, carefully spray weed killer directly onto the leaves. Avoid getting herbicide on the pavement itself as it can leave stains.
As a last resort, use a propane torch weed tool to scorch and kill unwanted vegetation growing in joints. Take safety precautions when using high heat.
Prevent weed growth in the first place by keeping joints filled flush with sand. Check for sunken or empty areas and re-fill as needed.
With vigilant prevention and early removal of weeds, pavement can stay pristine and weed-free for years. But some periodic maintenance will be required, so inspect and take action at the first signs of unwanted growth.
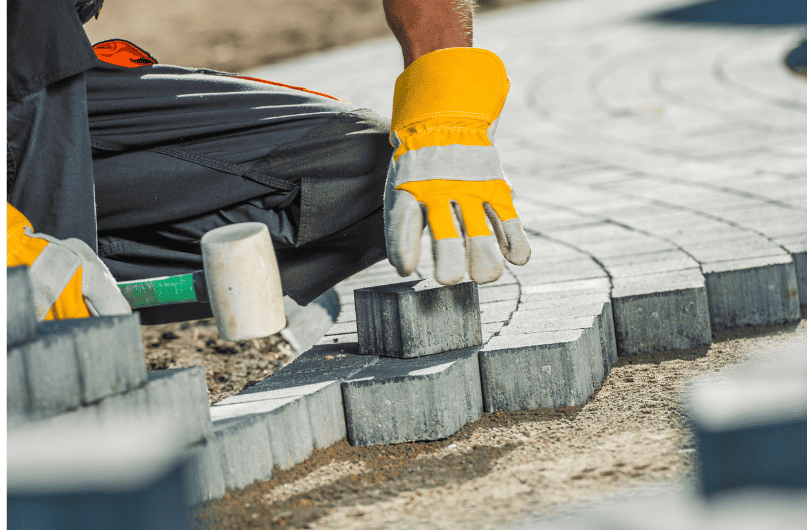
The cost of paving your garden can vary greatly depending on the materials used and whether you do it yourself or hire a professional. Some key factors that influence cost include:
Material costs - Natural stone like granite is generally the most expensive paving material, while concrete is the most affordable. Brick, tile, and manufactured pavers fall somewhere in between. Opting for a more premium material usually increases cost.
Amount of paving - The total square footage to be paved will determine how much material you need to purchase. Larger patios or pathways will require more supplies.
Professional vs DIY pricing - Hiring a professional paving company is often significantly more expensive than doing it yourself. However, their expertise can save time and lead to higher quality results.
Excavation requirements - If your site requires a lot of digging, gravel backfill, or grading, this can add substantially to the project cost. Simple flat sites tend to be cheaper.
Access issues - Sites that are difficult to access or require specialty equipment for material delivery could increase pricing. Easy access reduces costs.
To get an accurate estimate, it's best to get quotes from either landscape suppliers on materials or paving companies. Be sure to explain the specifics of your project. With some basic DIY skills, smaller paving jobs under $5,000 can potentially be tackled by homeowners.
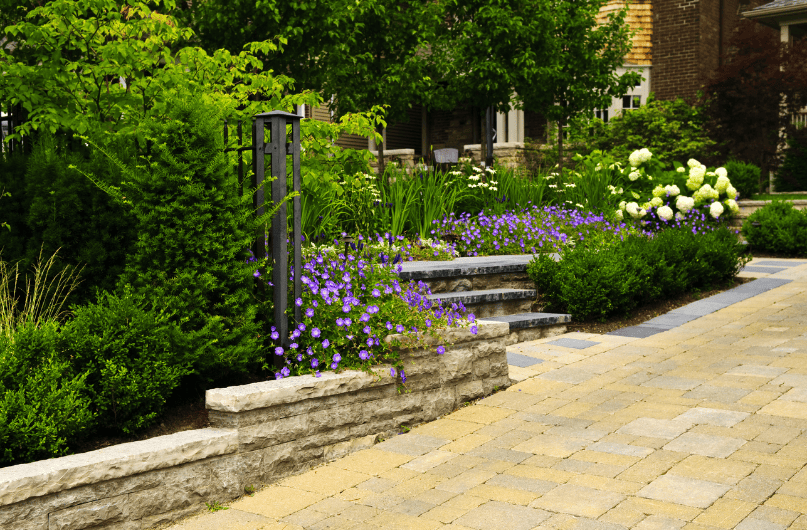
When installing garden paving, safety should be a top priority. Slips and falls can easily occur in a paved garden area if proper precautions are not taken. Here are some tips for maximizing safety:
Use paving materials with some texture and grip. Very smooth materials like porcelain or marble can become slippery, especially when wet. Choosing materials like natural stone, concrete pavers, or textured porcelain tiles will provide more traction.
Sweep regularly to prevent moss buildup. Moss thrives in shaded areas and can make pavers dangerously slick. Stay on top of moss prevention by sweeping paved areas often.
Install proper drainage and slope. You want water to drain off the pavers and not pool anywhere. Aim for a 1:40 slope (1 inch of drop for every 40 inches of run).
Use a sealant. Sealing your pavers will help prevent moss growth and make the surface less slick when wet. Reapply sealer every 1-2 years.
Add railings if needed. Railings provide support on steps, slopes, or elevated areas. Make sure railings meet local building codes for height and spacing requirements.
Provide adequate lighting. Motion sensor lights or low-voltage lighting around the perimeter ensures good visibility at night.
Watch for uneven settling. Over time, pavers can settle and become uneven. Grind down any raised edges greater than 1/4 inch to prevent tripping hazards.
Following safety codes and best practices during installation will help create a paved space that is beautiful, functional, and safe for years to come. Paying attention to factors like traction, drainage, railings, lighting, and maintenance is key.
Keeping your garden paving looking its best does require some regular maintenance. Here are some tips:
Sweeping/blowing - Use a broom, leaf blower or outdoor vacuum to regularly remove any dirt, leaves, pollen or other debris that accumulates on the pavers. This prevents staining or damage to the surface. Sweep gently to avoid grinding debris into the paver joints.
Washing - Periodically wash down the pavers using a hose, stiff broom and mild detergent to remove ingrained dirt. Avoid harsh chemicals that may stain or etch the pavers. Rinse thoroughly.
Re-sealing - Applying a fresh sealant every 2-3 years will protect the pavers and keep their color vibrant. Clean the surface thoroughly before re-sealing. Use a high quality acrylic sealer suitable for natural stone or concrete.
Weed control - Pull or spray weeds as soon as you notice them to prevent roots damaging the paver joints. Use a selective herbicide. Re-fill joints with polymeric sand after weeding.
Repairs - Lift and re-lay any cracked, chipped or uneven pavers. Fill joints as needed with fresh polymeric sand. You can grind down small high spots. Replace severely damaged pavers.
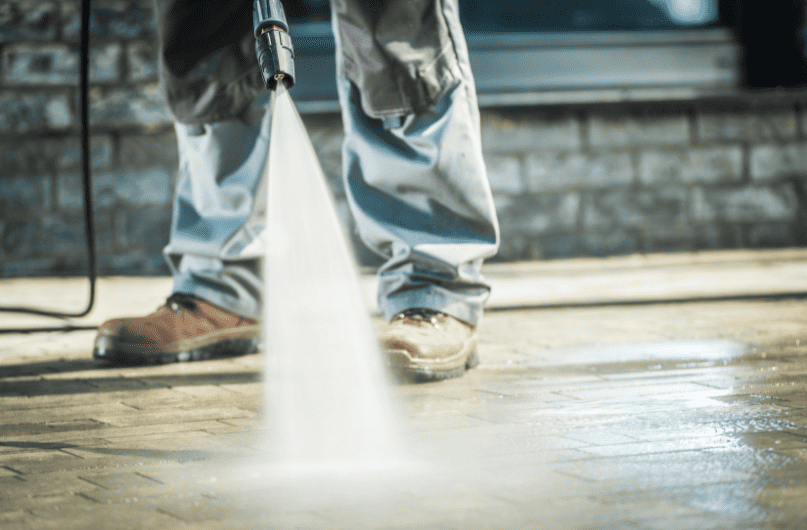
Pressure washing - For a deep clean every few years, you can pressure wash the pavers. Take care with pressure and aim wand carefully to avoid dislodging the sand in joints.
With regular simple maintenance, your garden paving can maintain its great looks for many years. It's a worthwhile investment to keep this asset in tip-top condition.
In closing, installing garden paving enables Kiwi homeowners to enjoy stylish, functional outdoor living spaces despite New Zealand's varied climate. With careful planning and material selection based on your region’s conditions, beautiful durable paving can enhance gardens nationwide. Following best practices for site preparation, drainage, patterns, edges, and maintenance outlined here will help ensure your new patio or path stands the test of time. Garden paving is a wonderful way to extend your home’s livable space that, when properly executed, will provide an inviting area for relaxation, dining and entertainment for years to come. Investing thoughtfully in this landscape asset adds value and everyday enjoyment to any home.
Concrete and natural stone are good options for hot, dry climates like Northland. They are durable, weather-resistant materials that won’t easily crack from heat and drought.
Brick pavers likely require the most maintenance over time. The mortar between clay bricks can deteriorate, requiring repointing. Bricks may also crack or chip with freeze/thaw cycles. Sealing is needed to protect color.
Polymeric sand contains polymers that harden when wet. This forms a barrier that prevents weed seeds and roots from penetrating into the joints between pavers. It helps reduce unwanted vegetation.
It's recommended to reapply a protective sealant to garden pavers about every 1-2 years. This maintains the vibrant color of the pavers and prevents staining or etching from things like moss growth and weather exposure over time.
Good drainage prevents water pooling under pavers, which leads to erosion, weed growth in cracks, slippery conditions, and freeze/thaw damage. Proper drainage extends the lifetime of the paved surface.
Moss thrives in shaded areas and grows well on pavers. To prevent moss, sweep regularly, maintain good drainage, apply protective sealer, and use paving materials with texture for grip. Removing moss promptly also helps deter regrowth.
Garden pavers should slope about 1 inch for every 40 inches of run, which equals a 2-3% slope. This grade directs water drainage off the pavers into surrounding garden beds, preventing hazardous pooling on the pavement.
