Artificial grass has become an increasingly popular alternative to natural grass lawns in backyards and landscapes across New Zealand. The primary benefit of artificial turf is its low maintenance requirement compared to real grass. Artificial grass does not need regular mowing, watering, or fertilizing. This makes artificial lawns a practical and convenient solution for many homeowners.
Installing artificial grass directly over a concrete surface is one way to create a lush green lawn without the need for an extensive lawn substrate. Laying synthetic turf over concrete can work well in certain situations. However, there are also some important considerations when it comes to proper installation and ensuring decent drainage.
This guide will provide an overview of the pros and cons, installation process, and key steps involved in laying artificial grass on concrete in New Zealand. We'll cover whether it's advisable, how to prepare the concrete surface, artificial turf options, drainage considerations, and maintenance requirements. Read on to learn more about creating an artificial lawn directly over concrete.
Pros of Artificial Grass on Concrete
Artificial grass offers a number of advantages when installed on a concrete surface:
-
Low Maintenance: Once artificial turf is installed, it requires very little ongoing care and maintenance. There is no need for regular mowing, watering, fertilizing or treatment with weed killers and pesticides like natural grass requires. The synthetic blades of artificial grass retain their fresh, green appearance without any effort.
-
No Watering Required: Since artificial turf does not grow, it does not need any watering. This makes it ideal for homes and businesses looking to conserve water usage. Installing artificial grass on concrete removes the need for irrigation systems.
-
Saves Time: Maintaining a beautiful lawn can be very time consuming, with tasks like mowing, edging and weeding taking up many hours each week in summer. Laying artificial grass on concrete provides a perfect, lush lawn without any of the hard work.
-
Always Green & Lush: Artificial grass maintains its vibrant color and thickness at all times, regardless of weather conditions. It does not turn brown or dormant during dry spells like real grass can. The synthetic materials are unaffected by changing seasons.
-
Durable & Long-Lasting: Quality artificial turf is extremely durable when laid on a hard surface like concrete. With proper installation, artificial grass can last up to 25 years with minimal fading. It stands up well to foot traffic without getting worn down.
Cons of Artificial Grass on Concrete
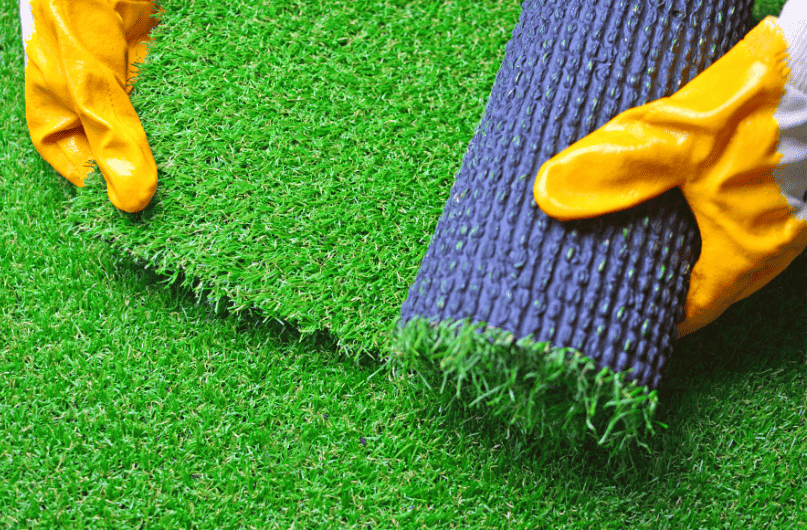
While artificial grass offers a low maintenance alternative to real grass, installing it on concrete does come with some potential drawbacks to consider:
-
Doesn't absorb rainwater, requires drainage - One of the biggest cons is that concrete and artificial grass will not absorb any rain or irrigation water. This means water will simply pool on top of the surface if proper drainage is not installed. Pooled water can lead to mildew, mold, and bacteria growth in the grass over time. A proper drainage system needs to be installed, such as having the concrete graded to drain away from the house or installing a drainage mat underneath the turf.
-
Hard surface is less forgiving for kids and pets - Artificial grass on concrete provides a less forgiving surface for kids or pets than installing it over soil. Falls and tumbles hurt more when landing on hard concrete versus natural ground. This may require extra safety precautions.
-
Hot surface temperature - Concrete absorbs heat from the sun and can get incredibly hot during summer months. The artificial grass will do little to reduce this heat. This can lead to burned paws on pets or uncomfortably hot temperatures for kids playing. Providing shaded areas may help mitigate this issue.
-
Can highlight imperfections - Any imperfections, cracks, stains, or unevenness in the concrete will likely show through the artificial grass. The concrete needs to be as smooth and flawless as possible before installing turf. Any repairs or patching should be done beforehand.
-
Glue odor - Adhesives are typically used to glue the artificial turf to concrete. This glue will have a strong odor for several days as it off-gasses VOCs. Keeping windows open or using fans can help ventilate while the odor dissipates. Those sensitive to chemical smells may want to avoid this.
Is it Possible to Install Artificial Grass on Concrete?
Yes, it is absolutely possible to install artificial grass on a concrete surface, however there are some important preparations and considerations to ensure it is done properly.
The key is making sure the concrete has the appropriate surface texture and slope for drainage, and securing the artificial turf adequately so it stays in place. Providing enough of a base layer between the concrete and grass is also important for cushioning and drainage.
With proper subsurface work, synthetic grass can be successfully installed onto existing concrete. The artificial turf fibers are able to withstand direct contact with the concrete. Just like with dirt or gravel bases, a cushioned underlayment placed below the artificial grass on concrete is recommended for additional comfort and safety.
The concrete needs to be clean, level, and porous enough to allow rainwater to drain through the turf backing and underlayment. If the concrete has a broom finish and is pitched away from buildings, it should work fine for laying fake grass. Any cracks or uneven areas in the slab should be patched and leveled first.
As long as the concrete foundation is flat, stable and drains well, it is possible to add beautiful, lush artificial grass on top that looks and feels like natural lawn. With the right materials and proper installation, synthetic turf performs well on concrete surfaces. The grass blades effectively disguise the hard surface underneath while providing an attractive, low maintenance alternative to real grass.
Preparing the Concrete Surface
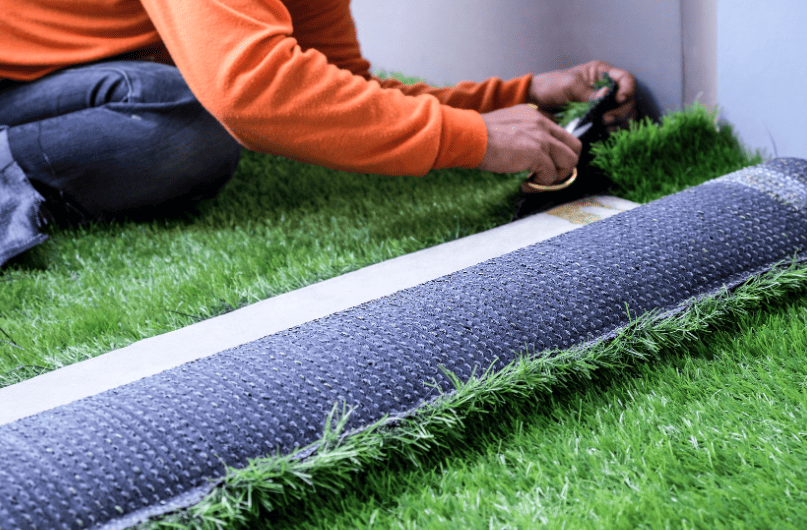
Before installing artificial grass on concrete, the surface needs to be properly prepared. Here are the key steps:
Cleaning
The concrete should be thoroughly cleaned to remove any dirt, debris, oil or grease that could prevent the artificial grass from adhering properly. Use a stiff brush and concrete degreaser to scrub the surface clean. Power wash if needed. Ensure the concrete is completely dry before moving to the next steps.
Leveling
The concrete surface should be as smooth and level as possible. Use a long straightedge to check for any high or low spots, bumps, or cracks that need to be filled in. For minor imperfections, you can use a floor leveling compound. Larger uneven areas may need to be resurfaced with new concrete. Proper drainage is important, so ideally the surface should have a very slight slope.
Adding a Sub-Base Layer
While some artificial grass products can be installed directly on concrete, it is often recommended to add a sub-base layer like crushed gravel first. This helps provide some cushioning, allows for drainage, and protects against concrete moisture. Spread the gravel in a 1-2 inch layer, compacting it down with a plate compactor. Then add your chosen weed barrier fabric over the gravel before installing the artificial turf.
Following these important preparation steps will provide the proper foundation needed for a successful artificial grass installation on concrete that will last for many years. The concrete surface needs to be clean, smooth, and level, and ideally have a sub-base layer added before installing the turf.
Installing Artificial Grass on Concrete
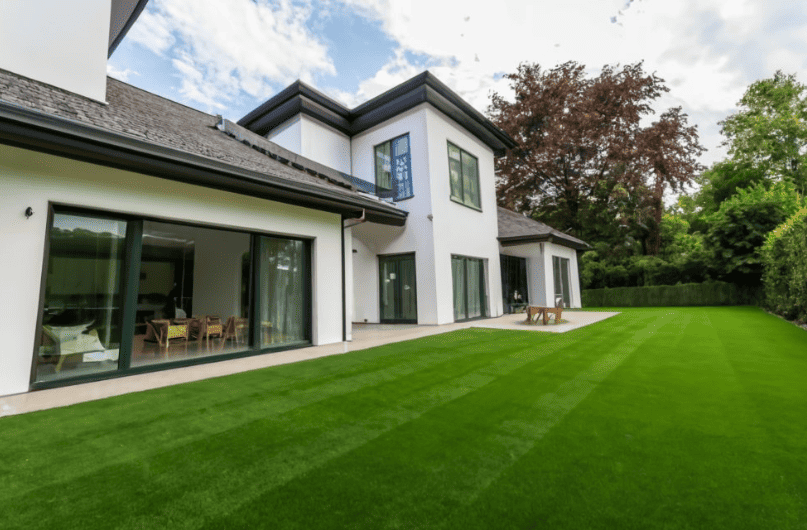
Laying artificial grass directly onto a concrete surface requires careful preparation and installation to ensure proper drainage and a natural looking lawn. Here are the key steps:
-
Clean the concrete thoroughly to remove any dirt, debris or loose material. Ensure the surface is completely dry before installation.
-
Apply a layer of weed barrier fabric over the concrete. This helps prevent weeds from growing up through the artificial turf. Staple the fabric securely in place.
-
Spread a thin layer of coarse sand over the weed barrier, around 1cm deep. This helps provide a more natural texture and some drainage under the turf. Rake the sand smooth.
-
Unroll the artificial grass and cut it to fit the area, leaving an extra 5-10cm around the edges. It's easier to cut the turf before gluing it in place.
-
Apply a turf adhesive to the concrete surface using a notched trowel. Use an adhesive suitable for bonding artificial grass to concrete.
-
Carefully lay the turf into the adhesive, pressing down firmly to secure it in place and eliminate any air bubbles. Work section by section.
-
Allow proper curing time for the adhesive before continuing with installation. This may take 24 hours.
-
Trim the excess grass around the edges with a sharp utility knife.
-
Use adhesive and seam tape to join different sections of turf to form one continuous lawn. Roll the seam to bond it.
-
Spread silica sand into the turf fibers and brush gently to fill the pile. This helps support the blades in an upright position.
-
Once the adhesive has fully cured, water the grass to rinse away any excess sand. Your artificial lawn on concrete is now complete.
Artificial Grass Drainage on Concrete
Drainage is an important consideration when installing artificial grass on concrete. Without proper drainage, water can pool under the artificial turf leading to bad odours, mould growth and other issues. There are a few ways to allow drainage when laying artificial grass on concrete in New Zealand:
-
Use an artificial turf product that has a permeable backing. Many modern artificial grass products are made with perforated backings that allow water to drain vertically down through the turf. The holes in the backing prevent water from pooling underneath.
-
Create drainage holes directly in the concrete. Using a masonry drill bit, you can make holes spaced throughout the concrete to give water escape points. The holes should be angled slightly to facilitate drainage. Place them every 30cm or so.
-
Install a runoff tray system. For this you'll need to frame the concrete area with timbers. Place the timbers around the perimeter with a 2-3cm gap between the wood and the concrete. Then use plastic trays made for artificial grass drainage to bridge the gap around the entire edge. The trays have small slits that allow water to drain out. You can also install a drain pipe in the tray system to move water away from the area.
Proper drainage under artificial grass on concrete is crucial for performance and longevity. Using one of these methods will prevent surface pooling, odours and mould growth. Check with the turf manufacturer for their recommendations to integrate drainage into your unique concrete installation. With the right preparation, artificial grass can be successfully installed on concrete areas to provide a lush lawn look.
Artificial Grass Edging Options
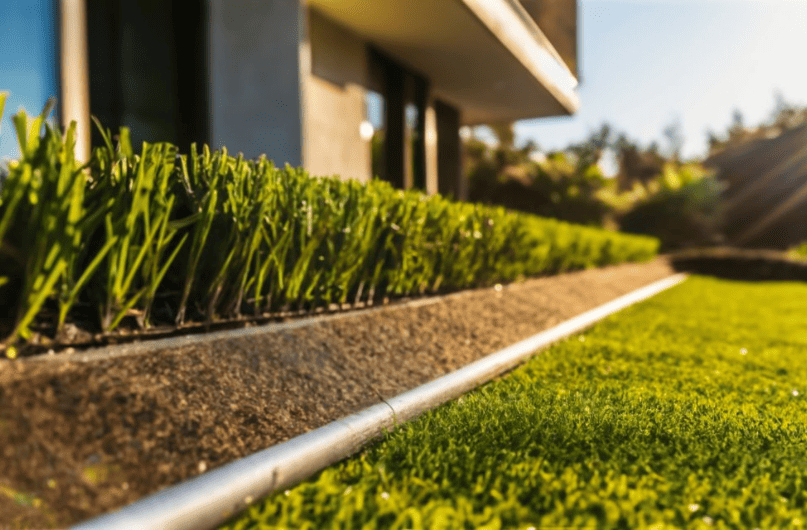
When installing artificial grass on a concrete surface, it's important to include some type of edging to create a border around the artificial lawn. There are several edging options to consider:
Concrete Curbing
One of the most popular edging choices is to install concrete curbing around the perimeter of the artificial grass area. Concrete curbing provides a sturdy border that delineates where the grass begins and ends. The curbing should be installed so that it is flush with the edges of the concrete slab. This helps prevent the artificial grass edges from peeling up over time. Concrete curbing comes in various shapes and colors to match the look you want to achieve.
Timber Edging
Timber makes for an attractive edging option. Pressure treated pine is a suitable timber for edging artificial grass. The timber boards should be secured into the concrete using masonry anchors. Leave a small gap between the boards to allow water to drain off the artificial lawn. Timber edging gives a natural look and is relatively low maintenance. Over time, the timber will weather to a silver-grey color.
Metal Edging
Aluminum and galvanized steel are common metals used to edge artificial grass. Metal lawn edging provides a clean, modern look. Like the timber edging, metal edging should be anchored into the concrete perimeter. Metal edging is very durable, though over time it can potentially rust. Look for rust-resistant metals or coatings when selecting a metal lawn edging product.
The edging for your artificial grass on concrete provides both form and function. Consider the look you want to achieve along with practical factors like budget and maintenance. Proper installation of high quality edging can help your artificial lawn last for many years.
Cutting Artificial Grass Around Objects
Cutting artificial grass around fixed objects like trees, fence posts, and walls takes some precision but is doable with the right tools. Here are some tips:
-
Use a sharp utility knife to cut the artificial turf. Make sure the blade is new so it creates clean cuts.
-
For straight lines, use a chalk line to create a cutting guide. Snap the chalk line around the object, then follow it with the utility knife.
-
Around tree trunks, cut a circle slightly larger than the trunk to allow space for growth. Cut from the edge of the turf towards the tree trunk.
-
For fence posts, cut two straight lines from the edge to the post. Then cut out a wedge shape at the post to allow the turf to fit flush.
-
Where the grass meets a wall, cut a straight line following the wall edge. Use a divider to maintain an even gap between the wall and grass.
-
Make relief cuts at corners and posts to allow the turf to bend and lie flat. The relief cuts should extend about 2/3 into the turf backing.
-
After cutting, use a roller to press the seams together for a tight fit. Apply turf adhesive along the seams for added stability.
-
Use a utility knife to trim any excess turf around the objects for a tailored, polished look.
With some careful measuring and cutting, you can install artificial grass right up to fixed objects for a seamless finish. Just take it slow and make relief cuts where needed.
Artificial Grass Maintenance on Concrete

Proper maintenance is crucial for keeping your artificial grass looking good and lasting a long time, even when installed over concrete. Here are some tips:
Regular Clearing
-
Remove leaves, branches or other debris at least once a week. This prevents materials from settling into the grass fibers and decomposing. Use a stiff brush or broom to lightly brush the grass.
-
Rake the blades upwards with a plastic rake to maintain their upright position. This improves drainage too.
Deep Cleaning
-
Every 2-3 months, use a bit of mild detergent and water to deep clean the artificial grass. Use a brush or broom to scrub the detergent into the grass.
-
Rinse the grass thoroughly to remove all detergent residue. You may need to weigh down the corners while rinsing to prevent the grass from lifting.
-
Allow the grass to dry fully in sunlight before using again. The sunlight helps further sanitize the grass.
Spot Cleaning
-
For spills and stains, spot clean the area immediately with a mixture of warm water and vinegar. The vinegar disinfects and removes odors.
-
You can also spot treat pet urine stains with an enzymatic cleaner designed specifically for artificial grass. Rinse and allow to dry fully afterwards.
Loose Seams
-
Check for loose seams or tears along the edges. Re-adhere any lifted edges with liquid seam sealer.
-
For minor tears, melt the fibers back together with a soldering iron on the synthetic setting. Larger tears may need patch repair.
Fluffing
- Over time, foot traffic can compress and mat down the blades. Use a stiff brush or plastic rake to fluff and stand the blades back up.
Following these maintenance tips will help keep your artificial grass looking great on your concrete area for many years. Let me know if you would like me to expand on any part of the artificial grass care and maintenance process.
Cost to Install Artificial Grass on Concrete in NZ
The installation of artificial grass on a concrete surface in New Zealand depends on several factors but we would not focus on the specific costs in this section:
Size of the Area: The size of the surface area to be covered forms one of the most significant factors. The larger the space, the more artificial grass will be needed, which naturally, might influence the entire project.
Material Costs: Beyond the grass itself, installing artificial grass also requires some additional materials e.g., underlayment, adhesive for seams, nails or screws, edging materials, and sometimes, specific drainage solutions. These tend to contribute to the overall costs.
Labour: Should you choose to hire a professional installer as opposed to DIY, the labour costs will form part of the total costs. Professional installers not only bring their expertise to the job, but also speed, allowing the project to potentially be completed in less time.
Site Preparation: The condition of the concrete surface and any required preparatory work are important factors. If the surface needs leveling, repair, or any other form of preparation, it would involve extra labour and possibly equipment rentals, thereby impacting the project.
Overall, the total cost of installing artificial grass on a concrete surface is guided by these factors. For a more detailed estimation, consider speaking with a professional installer or a landscape advisor. They can provide you with a comprehensive analysis based on your project details and the conditions of your surface.
Alternatives to Artificial Grass on Concrete
There are several alternatives to consider if you don't want to install artificial grass directly on concrete in New Zealand. Here are some of the most popular options:
Gravel
Spreading gravel over a concrete surface is one option. Gravel comes in various sizes and colors, providing design flexibility. It's also an affordable solution that allows rainwater drainage. However, gravel can scatter outside the boundaries and requires occasional raking to maintain its appearance. It may not provide the same softness underfoot as artificial grass.
Pavers
Installing concrete pavers on pedestals creates a raised surface over concrete with drainage gaps between the pavers. This provides a hard surface with better traction than artificial grass when wet. Pavers come in numerous shapes, colors and textures to suit different design tastes. But they can crack over time and require more maintenance than artificial turf.
Poured Rubber
Poured rubber creates a seamless rubberized surface over concrete for children's play areas or paths for example. It provides safety, cushioning and is durable in outdoor areas. Poured rubber is available in various colors and can have graphics embedded. However it's a more expensive option than artificial grass and requires professional installation. The surface can also become hot in direct sunlight.
FAQs
Can I install artificial grass directly on concrete?
Yes, it is possible to install artificial grass directly onto a concrete surface. However, the concrete will need to be properly prepared first by cleaning and roughening the surface to ensure the adhesive bonds properly.
How do I prepare concrete for artificial grass?
To prepare concrete for artificial grass, first sweep and pressure wash the surface to remove any dirt or debris. Once dry, sand or etched the surface using an etching solution to rough up the smooth concrete and allow the adhesive to bond. Ensure the concrete is flat, with no large cracks or holes. Fill any small cracks with patching compound.
What kind of base do I need under the artificial grass?
No additional base is required when installing artificial grass directly onto concrete. The concrete surface itself acts as the base. Just ensure it is cleaned, etched, level, and free of cracks before installation.
Can I install artificial grass on existing concrete pavers?
Installing artificial grass on existing concrete pavers is possible, but can be more challenging. The pavers must be solid, level, and have tight seams to prevent shifting. Using a flexible polyurethane binder between the pavers can help stabilize them before installing the turf.
How is artificial grass on concrete drained?
Drainage is important for artificial grass on any surface. On concrete, small holes can be drilled into the concrete before installing the turf to allow water drainage. Using a porous backing on the artificial grass can also improve drainage. Installing a slight slope for runoff is recommended.
What type of artificial grass is best on concrete?
Look for artificial grass designed specifically for use on hard surfaces like concrete. Turf with a porous or perforated backing will drain better. t's recommended to opt for a shorter pile height, ideally around 1.27 centimeters to reduce matting and impressions. The blades should be soft for comfort, yet durable.
Why You Need a Professional for Laying Artificial Grass on Concrete
It's essential to be aware of the complications that DIY installation can bring. With Real Landscaping, we provide a hassle-free solution that saves you from the potential pitfalls of installing artificial grass on your own. Here's why avoiding DIY and hiring our professional team is vital:
1. The Complexity of the Process: Laying artificial grass on concrete isn't just rolling it out and sticking it down. It requires knowledge and expertise for perfect execution. An uneven installment can lead to areas of poor drainage and can be unattractive and problematic.
2. Higher Potential for Errors: While DIY projects are commendable, they have a higher risk of errors. Messing up can mean more expenses in ordering more materials or even hiring a professional to fix it.
3. Time and Effort: Time is a precious commodity. Self-installation of artificial grass on concrete might seem straightforward, but it can become quite time-consuming.
With our expert landscape contractors at Real Landscaping, you'll enjoy a seamless artificial grass installation with no possibility of DIY mishaps.
Benefits of Our Services
Quality: Your outdoor space deserves the best quality. We provide artificial grass made from high-grade materials, promising durability and resistance against varying climates.
Experience: With decades of industry experience, our landscape contractors will guarantee your artificial grass is installed correctly the first time.
Cost-effective: Our team offers tailored solutions aligning with your needs and budget. We ensure the process is as cost-effective as possible, providing a great return on investment.
Sustainability: Our artificial grass solutions are a significant shift towards sustainability, reducing water usage and eliminating the need for harsh lawn care chemicals.
Ready to give your concrete surface the green upgrade it deserves? Don't wait any longer. Contact us today at Real Landscaping, and we are keen to make your artificial grass dreams come true.
Conclusion
Installing artificial grass on concrete in New Zealand is certainly possible with proper preparation and installation techniques. The key factors to consider are:
-
Artificial turf can transform boring concrete into a usable green space, but it's crucial to prepare the concrete surface correctly. This includes cleaning, etching, applying adhesive primer, and ensuring proper drainage.
-
There are various artificial grass options suitable for concrete, with variables like pile height, thatch layer, and backing system. Opt for a durable, UV-resistant product designed for heavy foot traffic.
-
Proper installation techniques are vital, like securing the edges and seams. Using an edging system around the perimeter helps stabilize the turf.
-
Routine maintenance like brushing and rinsing the artificial grass is required. With proper care, quality artificial turf can last many years on a concrete surface.
-
Installation costs vary based on the size of the area, materials required, and professional installation fees if not doing it yourself. Larger spaces usually achieve better economies of scale.
-
Alternatives like interlocking pavers, concrete resurfacing products, or patio tiles may better suit some budgets and project scopes. But artificial grass remains a versatile and cost-effective option in many cases.
When installed correctly using quality materials, artificial grass can transform barren concrete into an appealing green oasis. With some planning and preparation, installing turf on concrete is certainly feasible for New Zealand homes and businesses.
Garden edging has surged in popularity for enhancing landscapes across New Zealand. Both residential and commercial properties are utilizing quality edging installations to elevate their outdoor spaces.
Beyond just delineating spaces, professional edging delivers numerous benefits that can take any garden to the next level. It provides an attractive border while also simplifying maintenance and deterring weed growth. Edging helps guide the eye, defines spaces, and adds visual interest through color, texture and materials.
With proper installation, garden edging can withstand the weather and last for years with minimal upkeep. It's an investment that pays dividends for the lifetime of the landscape. This article will explore the top reasons savvy homeowners and businesses choose professional edging installation to boost their garden's style and functionality.
Define Spaces with Striking Lines and Shapes
Garden edging creates defined spaces within the landscape which help guide the eye and complement the overall design. Crisp lines and intentional shapes allow beds, paths, and sections to stand out. This gives a more polished look compared to free-flowing lawns that blend together.
The edging forms a clear visual boundary that separates unlike elements. This could be garden beds from the surrounding flat lawn. Or gravel paths from adjacent planting areas. Edging contrasts the textures and forms a distinction.
Whether you prefer a formal symmetrical garden or natural flowing shapes, edging lends structure. Straight lines and neat curves craft geometries. The edging shape and layout impacts how the eye moves through the space. Formal gardens may use straight lines, squares and rectangles. Freeform gardens can incorporate more organic waves and curves.
Edging choices, designs, materials and colors should align with the garden style for a cohesive look. The edging shapes can echo other hardscaping like patios, pergolas and water features. When designed holistically, the edging ties the landscape together by defining these crafted spaces.
Enhance Visual Interest and Personality
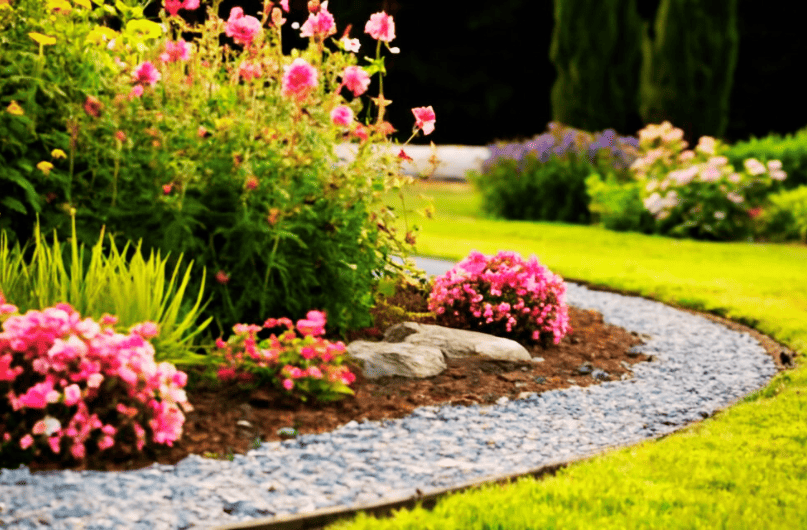
A beautiful garden edge can add striking visual contrast in color, shape, and texture to the landscape. The effect draws the eye to the edge as an intentional design element that complements the garden style.
Metal, concrete, or wood edging materials offer color and texture choices that pair well with surrounding plants and hardscaping materials. For example, rustic brick or natural stone edging can match a Mediterranean or cottage garden, while sleek aluminum captures a contemporary look. Vibrant colors like red metal or orange recycled plastic make the edge pop as a unique focal point.
The linear shapes and distinct textures create separation from the lawn or mulch areas. This contrast highlights the edge as a decorative feature that adds lively interest and personality to the garden. Making a style statement with garden edging elevates the entire aesthetic.
Deter Weeds and Retain Soil and Mulch
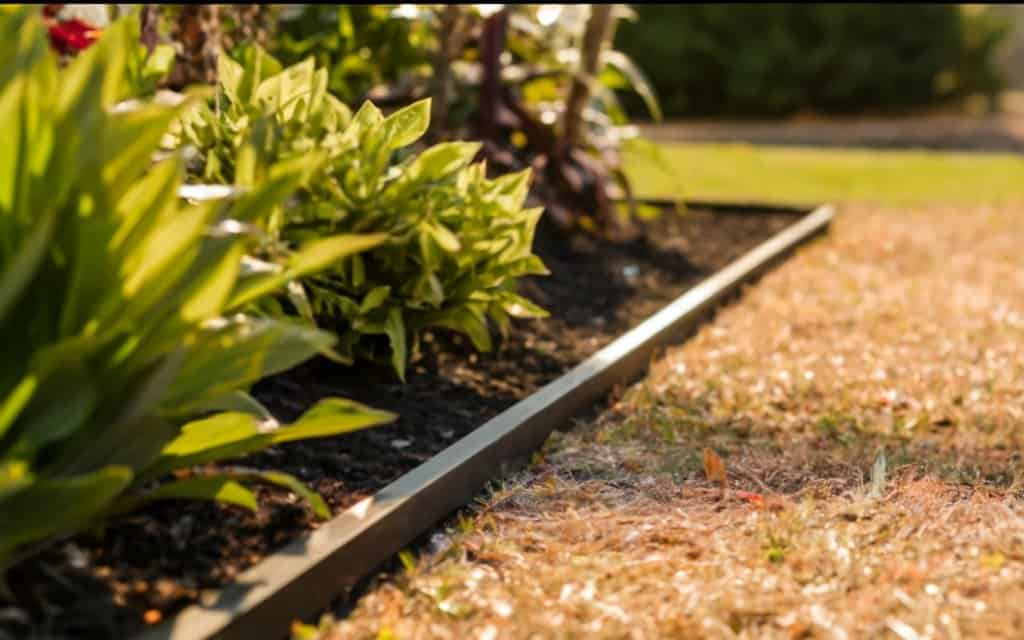
Quality edging forms a durable physical barrier that helps contain garden beds. This barrier prevents precious topsoil, mulch, gravel, or other materials from spreading into the lawn or other areas. The defined edge also stops weeds like wiregrass and creeping charlie from encroaching via underground stems and surface runners. With a sturdy border in place, there is less need for harsh weedkillers. Your garden beds can flourish in their planned spaces without invasive plants stealing water, nutrients, and sunlight.
The edging barrier also enables the use of ornamental rocks, wood chip mulch, or other decorative materials within the bed, without fear of them scattering. Whether natural or geometric in style, the edging keeps each zone looking pristine. This prevents the frustrations of debris in the lawn and plants crossing into the wrong areas. Investing in professional edging installation creates a durable containment system that saves time and effort in the long run. Your garden can develop into a flawless vision without constant hands-on maintenance at the borders.
Easier Maintenance
Quality edging greatly simplifies ongoing garden maintenance in several ways. First, it minimizes the need for lawn trimming along bed edges. Without a durable border, grass can creep into planting beds over time. This requires meticulous trimming to keep the edge neat. With a properly installed edge, trimming is only needed occasionally.
Edging also reduces time spent weeding and replacing eroded soil. It forms a sturdy barrier that contains mulch, gravel, and soil within the bed. This prevents gradual encroachment of weeds from the lawn or other areas. Likewise, edging stops rainstorms or watering from washing away topsoil. Less weeding and soil replacement means more time enjoying your garden instead of laboring over it.
Invest in Durable, Long-Lasting Edging
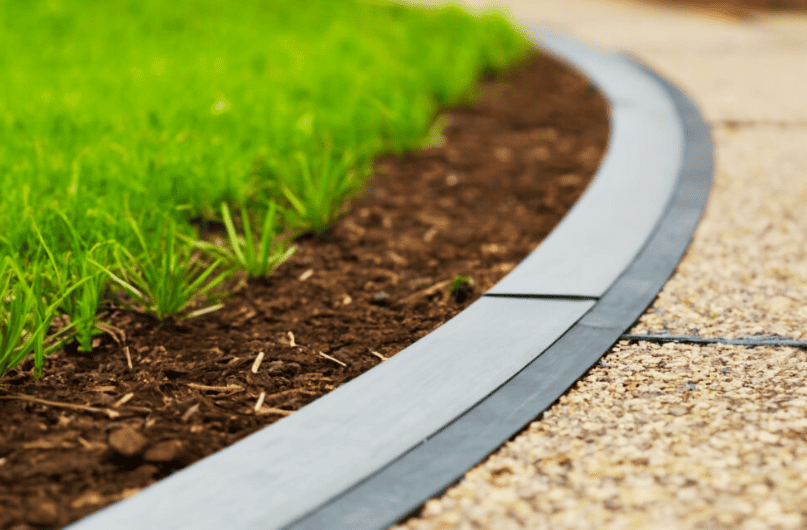
When selecting edging for your garden, it's important to choose materials that can withstand the test of time. Quality edging solutions made from steel, aluminum, and concrete offer unparalleled durability and longevity.
Steel garden edging provides strength and stability that lasts for decades. Properly installed steel edges will maintain their shape without bending, warping, or breaking down. Aluminum edging is also prized for its corrosion resistance and longevity through all weather conditions.
For those seeking a natural look, concrete edging interlocking blocks blend security with aesthetic appeal. Concrete maintains its integrity and form to keep beds neatly divided year after year. The color and texture options of concrete materials also allow for customization to your landscape design.
No matter which durable material you select, you can expect your investment to keep your garden looking pristine while resisting weathering, cracking, rotting, and splintering. High-quality edging solutions pay for themselves over time by eliminating ongoing maintenance and repairs. Your edging should outlast inexpensive plastic or composite options many times over.
Choosing durable edging that withstands the elements will keep your garden looking flawless for many years to come. Consult with a professional landscaper to explore long-lasting edging options crafted from steel, aluminum, and concrete.
Investment Value
Installing professional garden edging is an investment that pays dividends for years to come. With a lifespan of 25-50 years for materials like aluminum and steel, the edges will maintain their flawless look without needing replacement. This longevity makes garden edging a fantastic return on your landscaping investment.
Beyond the long-term durability, upgrading to high-quality edging immediately increases your property's curb appeal and value. Defined garden beds and pathways make the entire yard look meticulously maintained and designed. The striking lines and dimensional edges are aesthetic features that home buyers desire in outdoor spaces. Landscape edging adds to the overall property value, while also making the yard more enjoyable during your own time in the home.
Getting professionally installed garden edging provides lasting rewards that more than justify the initial investment. With increased property value and decades of durable service, this landscape upgrade is a wise investment that will pay dividends for years to come.
Professional Installation
For the most seamless edging installation, it's wise to hire a professional landscape designer or contractor rather than trying to DIY. Professionals have the experience, tools, and skills to provide precision edging for a flawless finished look.
Key benefits of professional installation include:
- Expertise in working with various edging materials and installation methods
- Access to specialized tools like edging trenches and stakes for perfect alignment
- Precision cutting and shaping of edges for smooth, even lines and curves
- Knowledge of proper base preparation for stability and drainage
- Tidy excavation of existing grass and soil to accommodate new edging
- Finishing touches like backfilling and tamping edges to hold their shape
- Experience "cutting-in" edging against existing hardscapes like patios and walkways
Professionals also know how to properly select edging styles and materials to complement the overall garden design. This helps create an integrated look where the edging aligns with the hardscaping and other features.
For edging that truly enhances your landscape, trust the experts. Reputable landscape designers have portfolios showing their eye for detail. The precision they offer takes do-it-yourself projects to the next level for stunning curb appeal and functionality.
Popular Styles
Garden edging comes in a variety of styles to complement any landscape design. Here is an overview of some of the most popular edging materials along with their pros and cons:
Steel Edging
-
Pros: Very durable, long-lasting, and low maintenance. Provides clean, modern lines and is easy to install. Offers a range of colors like black, green, or galvanized metal.
-
Cons: Can be expensive. Not as natural looking as stone or brick.
Brick Edging
-
Pros: Classic look goes well with pavers and traditional homes. Red brick provides bold color contrast. Can be installed in straight lines or curves.
-
Cons: Installation is labor-intensive. Mortar can crack over time. Not pet or child-friendly due to rough surface.
Natural Stone Edging
-
Pros: Provides a natural, organic look. Materials like granite or bluestone are very durable. Can be cut into custom shapes.
-
Cons: Irregular stone shapes make installation challenging. Needs to be reset as stones shift. Expensive compared to other options.
Plastic/Resin Edging
-
Pros: Affordable, low maintenance option. Flexible pieces are easy to install. Available in neutral colors.
-
Cons: Less durable than metal, brick or stone. Can fade, crack or warp over time. Less refined appearance.
Aluminum Edging
-
Pros: Lightweight for easy handling. Resists dents and corrosion. Neutral silver/grey color blends into gardens.
-
Cons: Can bend out of shape if impacted. Not as decorative as other styles.
Why Hire Real Landscaping for Professional Edging Installation
Choosing Real Landscaping ensures flawless garden edging installations. Our team provides precise cutting, shaping, and alignment, utilizing professional tools and techniques. We skillfully prepare bases for stability and effective drainage and neatly excavate existing elements for seamless incorporation of new edging. Specializing in working with a variety of edging materials and styles, our installation processes not only enhance the aesthetics but also improve the functionality of your garden. Make Real Landscaping your choice for professional garden edging and experience a dramatic transformation of your outdoor living space.
Conclusion
Installing professional garden edging offers numerous advantages that make it a wise investment for enhancing your outdoor space. The key benefits covered in this article include:
- Defining distinct spaces and garden areas with clean lines and shapes
- Adding visual interest and personality to complement your landscape style
- Deterring weed growth and retaining soil and mulch within plant beds
- Simplifying maintenance by reducing trimming, edging, and weeding needs
- Choosing durable, low-maintenance edging materials that withstand weathering
With this range of improvements for aesthetic appeal, functionality, and longevity, high-quality garden edging is sure to take your landscape to the next level. Consult with professional landscapers to explore the best edging options to fulfill your garden vision. They can assess your needs, recommend suitable styles, and handle a flawless installation for enduring results. Give your New Zealand garden clean definition, striking personality, and simplified upkeep with expertly installed garden edging.
FAQ's
What types of edging materials are most popular?
The most popular edging materials are steel, aluminum, brick, natural stone, plastic/resin, and concrete. Steel and aluminum are prized for sleek modern lines and extreme durability. Brick and natural stone offer a classic, organic appearance. Plastic/resin edging is affordable and easy to install. Concrete provides a natural look that blends security with aesthetic appeal.
What's the best way to maintain my new garden edging?
Annual inspection of the edging shape, alignment, and stability is the best way to maintain durability. Refasten any loose materials or attachments to prevent future shifting. Clear away debris, leaves, or plants encroaching on the edging. Check for cracks or deterioration of materials. Touch up paint on steel or aluminum edges as needed to prevent corrosion.
Should I seal, waterproof or treat natural stone or brick edging?
Sealing porous materials like natural stone and brick edging is highly recommended. Sealers and waterproofing treatments prevent freeze-thaw damage in cold climates. They also reduce staining from dirt or lawn chemicals. Apply sealants made specifically for the edging material following the manufacturer's directions for the longest durability. Re-apply every 2-4 years.
How long does professional garden edging last on average?
With proper base preparation and routine maintenance, professionally installed garden edging lasts 25-50 years on average depending on materials. High-end options like commercial-grade steel and aluminum can last 50+ years. Concrete and natural stone may last 30-40 years. Plastic composites last 10-15 years typically before needing replacement. Investing in durable edging saves replacement costs long-term.
Why hire a professional installer for garden edging rather than DIY?
Professionals have specialized tools and expertise to ensure a flawless, precision edging installation. Their portfolios showcase attention to detail that takes projects to the next level. Benefits include proper base preparation, tidy excavation, and shaping, seamless transitions between materials, level alignments, and tamping/finishing touches. Their experience in selection and installation creates an integrated, polished look.
New Zealand's stunning landscapes are shaped by nature's diverse hand. From the lush, rain-kissed rainforests of Fiordland to the sun-drenched vineyards of Central Otago, our islands boast a staggering range of microclimates. This breathtaking beauty, however, presents a unique challenge for gardeners: watering wisely in a land where weather patterns can shift like sand dunes.
With diverse climates ranging from coastal breezes to alpine chills, tailored irrigation systems are needed to promote water conservation and healthy gardens across the country. Automated sprinkler systems excel at delivering targeted hydration, minimizing waste and effort while maximizing plant health.
Water Conservation Champion
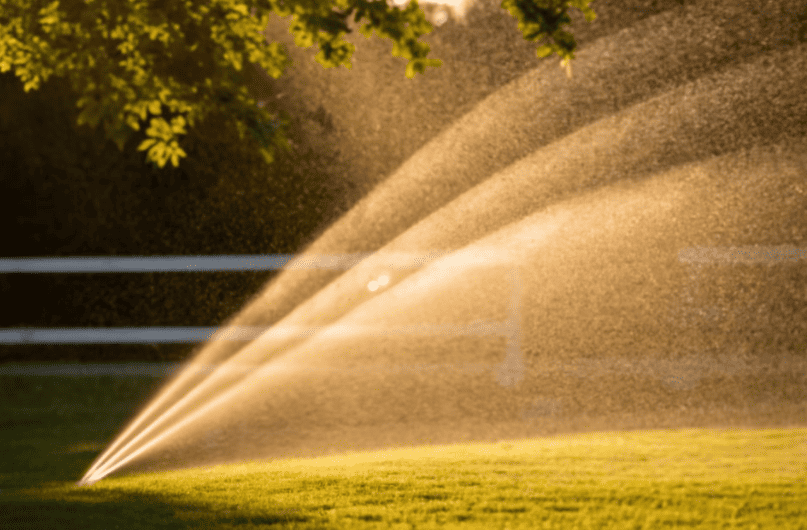
New Zealand is committed to sustainable water use, and automated systems excel at delivering water directly to plant roots, eliminating wasteful runoff and evaporation. These smart sprinkler systems are extremely efficient - every drop goes right where it's needed most to nourish plants.
By preventing water loss through overspray and evaporation, homeowners with automatic irrigation can reduce their household water usage by up to 35%. This savings adds up quickly, leading to lower water bills and reducing strain on local water supplies.
In times of drought or water restrictions, automated sprinklers can be easily adjusted to use less water. Scheduling features ensure the systems run in the cool night hours, minimizing waste through evaporation. Smart soil sensors prevent overwatering by shutting off the system after soil moisture reaches the desired level.
With their precision targeting and programmable schedules, automated sprinklers are a water-saving hero for the garden. NZ homeowners who install these systems are doing their part to use water wisely while keeping their landscapes healthy and thriving. It's a win-win for conservation and convenience.
Effortless Convenience
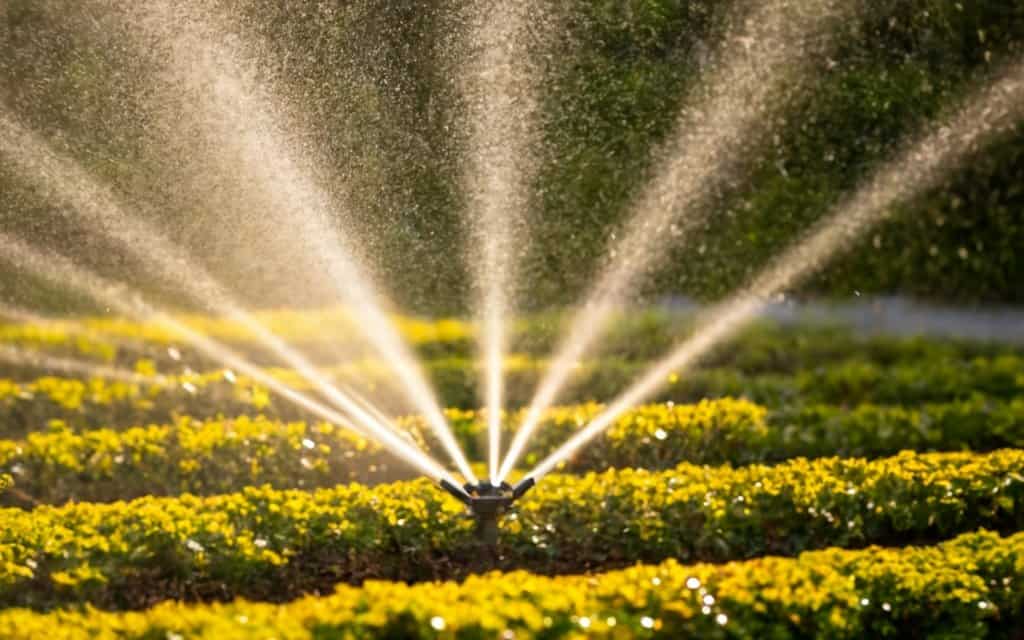
Modern automated irrigation systems allow you to program watering schedules that perfectly match the needs of your garden. Simply input the desired run times, frequency, and start times into the controller and it will handle irrigation for you. No more fiddling with sprinklers or dragging hoses around the garden.
These intelligent controllers monitor weather, soil moisture, and evaporation rates and automatically adjust the watering schedule for you. Just set it and forget it - the system will make sure your garden gets watered as needed, regardless of changing weather patterns. That means you get to enjoy your garden without the backbreaking work of manual watering.
Automated systems also allow you to customize watering schedules for different zones in your garden based on sun exposure, soil type, and the watering needs of specific plants. For example, natives and succulents need less frequent watering than vegetables and flowering annuals. With programmable controllers, you can cater to the unique needs of every section of your garden.
Let your irrigation system shoulder the watering work so you can relax and appreciate your garden. The convenience and customizable scheduling of modern controllers eliminates the chore of manual watering. Ditch the hose and enjoy effortless irrigation automated just for you!
Customized Care
Smart irrigation controllers use sensors to tailor watering schedules to local conditions. Soil moisture sensors prevent overwatering by telling the controller when the ground is sufficiently saturated. Rain sensors halt watering when precipitation is detected. And weather sensors adjust schedules based on factors like temperature, humidity, and wind speed.
These sensor technologies allow automated systems to water appropriately regardless of soil type, recent rainfall, or microclimate. Native plants especially benefit from the customized care. With their sensitivity to overwatering, natives thrive when irrigation is fine-tuned to mimic natural precipitation patterns.
Sensors also account for seasonal fluctuations. As sunny summers transition to rainy winters, the controller self-adjusts, preventing wasted water. And during winter months, some controllers can activate valves just long enough to prevent pipes from freezing.
With real-time data guiding watering decisions, automated sprinkler systems nurture robust root systems and healthy plants suited to each unique garden environment.
Plant Powerhouse
Consistent, targeted watering promotes healthy root development, boosting plant resilience and resistance to pests and diseases. Native species especially benefit from reliability of moisture delivered right where they need it. The automated sprinklers provide hydration directly to the plant roots, which minimizes water waste and maximizes growth potential.
With moisture delivered precisely to the root zone, plants are able to develop robust and intricate root systems. This strong foundation results in more vigorous foliage growth above ground. Leaves and stems remain lush and vibrant, as the roots can supply ample nutrients and water even during dry spells.
Having access to consistent moisture also bolsters a plant's defenses. Well-hydrated vegetation can better withstand pest pressures and has heightened immunity to fungal or bacterial diseases. This is a key advantage for New Zealand's native flora, including tree ferns and cabbage trees, which thrive with reliable hydration from smart irrigation systems.
By catering to the roots first, automated sprinklers cultivate stronger, healthier, more resilient plants. Forget shallow watering that dampens only the topsoil. Your garden needs hydration that penetrates deep, nourishing plants from the ground up. That's the beauty of targeted irrigation - maximum growth with minimum waste.
Coastal Cool
New Zealand's coastal regions are blessed with mild temperatures but challenged with low rainfall. This combination demands smart irrigation choices to keep gardens lush without wasting water.
The solution? Efficient drip irrigation paired with smart controllers that prevent overwatering.
Drip irrigation delivers hydration right to plant roots through networks of tubes and emitters. Water is dispensed slowly and directly into the soil, eliminating runoff. Coastal gardeners will use up to 70% less water compared to sprinklers!
Drip kits for gardens and borders come with simple installation. Just lay out the tubing and stake down the emitters. For larger areas like lawns, combine targeted drip zones with traditional sprinkler heads.
The key is using smart controllers to manage the system. The latest technology lets you program watering schedules down to the minute. Some controllers even link up with weather stations to automatically adjust for rain, wind and temperature changes. Overwatering becomes a thing of the past.
By combining miserly drip irrigation with intelligent controllers, coastal gardeners can nurture their oases while staying true to New Zealand's conservation values. Your garden will thrive with less work and less worry over water waste.
Lush Days in Auckland
The warm, humid climate of Auckland makes for flourishing gardens, but also demands careful watering to ensure plant health. Popular regions like Manukau, North Shore, and Waitakere could benefit immensely from using adjustable rotor sprinklers to cover the larger lawn areas. The rotor sprinklers can handle the variety of weather conditions Auckland experiences without disruptions in coverage.
Investing in a smart irrigation controller is especially important for Auckland's microclimate fluctuations. Look for programmable controllers that allow you to adjust watering schedules and durations to match the changing conditions from wet winter to warm summer. The controller should tailor watering intervals to match different seasonal evaporation rates, ramping up during the drier months and scaling back during the rainy season to conserve water.
In the cooler regions, freeze sensors can be a wise addition. The sensors will shut down your system in freezing conditions to prevent pipe damage, promoting longevity of the irrigation system. To ensure a total protection, we recommend winterizing the irrigation system by shutting off water, draining pipes, and insulating valves.
With the right combination of equipment, smart controls, and seasonal adjustments, your automated sprinkler systems can thrive in Auckland's diverse climate. Real Landscaping provides experienced irrigation specialists to design and maintain a system tailored to your property's unique needs and location.
Alpine Adventures
Harsh winters and fluctuating precipitation call for flexible scheduling when installing automated sprinkler systems in New Zealand's alpine regions. The extreme temperature shifts from season to season demand that sprinkler schedules adapt and deliver the right amount of moisture at the right time.
Rotor sprinklers with adjustable output are a smart choice for irrigating larger lawns and gardens in alpine areas. These sprinklers can tailor precipitation rates to the current weather conditions and plant needs. During the rainy spring season, rotor output can be dialed back to provide less water. When drier summer weather arrives, output can be increased as needed.
Investing in a programmable smart controller is also highly recommended for alpine regions. These controllers allow you to set customized watering schedules that automatically adjust based on the time of year. In the winter, you can set the controller to irrigate less frequently. In the summer, watering frequency can be increased with just a few button presses. Many smart controllers also have sensors that suspend watering for up to 72 hours if rain is detected, preventing overwatering.
As a final tip, consider installing a rain barrel and drip irrigation system to take advantage of spring snowmelt in alpine gardens. Capture the precious runoff from snow thaws in a rain barrel. Then use a water-efficient drip system to deliver it directly to the roots of thirsty plants as needed throughout the season. This will provide a supplemental water source between automated sprinkler cycles.
With flexible scheduling and smart watering adjustments, automated sprinkler systems can adapt to the unique precipitation patterns and planting needs of New Zealand's dramatic alpine landscapes.
Investing in Efficiency, Investing in Peace of Mind
Expert Installation
Real Landscaping is your go-to professional irrigation specialist. We design and install systems tailored to your garden's unique needs and local regulations. Our expertise ensures the proper placement of pipes, valves, sprinkler heads, and controllers based on the specific conditions of your landscape, preventing over- or under-watering of plants.
Our irrigation professionals have extensive knowledge of consent requirements and water restrictions in your council area. We'll handle the permitting process for you, saving you time and headache.
A professional assessment of your garden by Real Landscaping specialists will help determine the right system components, such as drip irrigation for borders or rotor sprinklers for open lawns. We analyze sunlight exposure, soil type, and other factors to create a customized hydration plan designed for your garden's success.
Our licensed technicians properly size pipes and select components that won't clog or leak over time, giving you peace of mind that your system was installed correctly for maximum efficiency.
Trust Real Landscaping experts to handle the design and installation. Our years of experience will create the ideal watering system tailored for your unique New Zealand garden.
Maintenance Made Easy
Regular maintenance keeps your automated irrigation system operating at peak efficiency. Follow these tips to get the most out of your investment:
Winterize for Worry-Free Operation
- Drain pipes, valves, and sprinkler heads before the first freeze to prevent damage from expanding water.
- Insulate above-ground pipes and backflow prevention devices to protect from freezing temperatures.
- Shut off the water supply and drain the system when not in use during winter months.
- Disconnect and store above-ground sprinkler heads over winter.
Keep Heads Clear for Optimal Flow
- Regularly check and clean out sprinkler heads and filters to prevent clogging from dirt and debris.
- Gently flush heads with water to maintain a free flow of water to plants and lawns.
- Adjust or replace sprinkler heads that get blocked and don't pop back up.
Adjust Schedules by Season
- Program seasonal start and stop times based on local weather patterns and plant needs.
- Set controllers to water less frequently in cool, wet seasons.
- Increase watering durations and frequency during the heat of summer.
- Modify schedules immediately after unseasonal weather like cold snaps or heat waves.
With some simple seasonal maintenance, your automated system will operate smoothly for years of water-efficient irrigation.
Conclusion
In conclusion, navigating New Zealand's diverse microclimates and landscapes presents unique challenges for gardeners. However, automated sprinkler systems provide smart irrigation solutions, promoting water conservation and plant health. By understanding regional climate differences and employing automated systems designed for precise watering, you can maintain beautiful gardens while contributing to sustainability. Embrace technology, conserve water and enjoy the flourishing paradise that New Zealand gardens have to offer.
FAQ's
What is the challenge for gardeners in New Zealand due to diverse landscapes and microclimates?
Due to New Zealand's diverse landscapes and microclimates, gardeners face the unique challenge of watering wisely. This involves using tailored irrigation systems that can efficiently conserve water and nourish the gardens across different regions of the country.
How do automated sprinkler systems enhance water conservation practices in New Zealand?
Automated sprinkler systems help enhance water conservation practices by delivering water directly to plant roots. This eliminates wasteful runoff and evaporation. Homeowners with automatic irrigation can reduce their household water usage by up to 35%, leading to lower water bills and reducing strain on local water supplies.
How can modern automated irrigation systems improve the convenience of gardening in New Zealand's diverse microclimates?
Modern automated irrigation systems simplify gardening in New Zealand's various climates by monitoring weather, soil moisture, and evaporation rates. Users can program watering schedules that suit their garden's needs, and the system adjusts the watering schedule automatically, without requiring manual intervention.
What are the benefits of using smart irrigation controllers and sensors in automated sprinkler systems?
Smart irrigation controllers in automated systems precisely tailor watering schedules to local conditions using soil moisture sensors and weather sensors. They prevent overwatering, adjust schedules based on temperature, humidity, and wind speed, and account for seasonal fluctuations, leading to healthier plants and more efficient water usage.
What are the recommendations for maintaining efficiency in automated sprinkler systems in New Zealand?
For maintaining efficiency in automated sprinkler systems, regular maintenance such as winterizing for worry-free operation, ensuring the heads are clear for optimal flow, and adjusting schedules according to seasons are recommended. Regular checks and cleaning of the sprinklers and adjusting the watering schedule based on the local weather patterns and plant needs can prolong the system's lifespan and enhance water use.
Conclusion
FAQ's
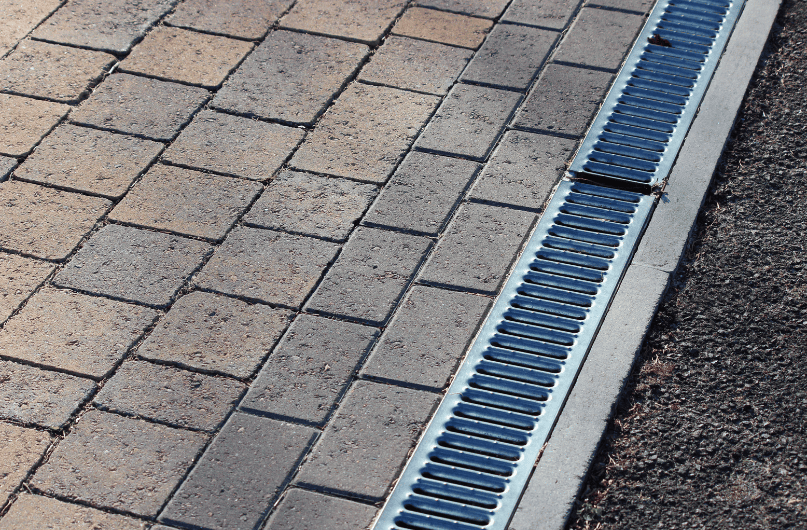
What is the best paving material for a garden in hot, dry Northland?
Concrete and natural stone are good options for hot, dry climates like Northland. They are durable, weather-resistant materials that won’t easily crack from heat and drought.
Which paving material requires the most maintenance?
Brick pavers likely require the most maintenance over time. The mortar between clay bricks can deteriorate, requiring repointing. Bricks may also crack or chip with freeze/thaw cycles. Sealing is needed to protect color.
What’s the benefit of using polymeric sand for paver joints?
Polymeric sand contains polymers that harden when wet. This forms a barrier that prevents weed seeds and roots from penetrating into the joints between pavers. It helps reduce unwanted vegetation.
How often should you reapply sealant to garden pavers?
It's recommended to reapply a protective sealant to garden pavers about every 1-2 years. This maintains the vibrant color of the pavers and prevents staining or etching from things like moss growth and weather exposure over time.
Why is drainage important under garden pavers?
Good drainage prevents water pooling under pavers, which leads to erosion, weed growth in cracks, slippery conditions, and freeze/thaw damage. Proper drainage extends the lifetime of the paved surface.
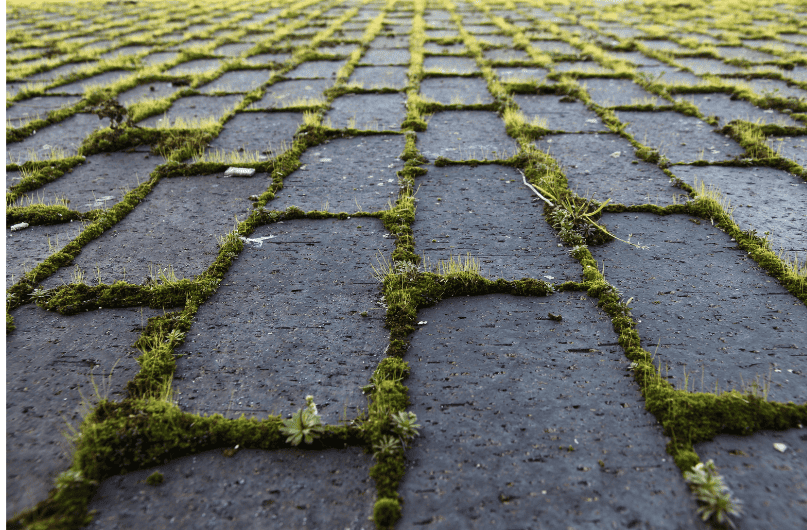
What causes moss to grow on pavers and how can you prevent it?
Moss thrives in shaded areas and grows well on pavers. To prevent moss, sweep regularly, maintain good drainage, apply protective sealer, and use paving materials with texture for grip. Removing moss promptly also helps deter regrowth.
How much slope should garden pavers have for adequate drainage?
Garden pavers should slope about 1 inch for every 40 inches of run, which equals a 2-3% slope. This grade directs water drainage off the pavers into surrounding garden beds, preventing hazardous pooling on the pavement.
Picture it now - you're reclining on a spacious timber deck tucked amidst your yard's rolling hills and lush native trees. The morning air is crisp and bright, carrying the sweet scent of rain on hot cedar. Your deck serves as an outdoor oasis - a space to gather friends old and new under starry skies, relax with a cuppa after work, and make lasting summer memories with whānau.
But where do you start to make this backyard paradise a reality? With so many deck builders to choose from, the options can quickly become a tangled mess worse than your neighbor's overgrown ponga. This guide will lead you out of the bush and provide clarity on finding the perfect deck pro for your home. We'll explore what truly matters when vetting builders: marks of experience, reputation red flags, portfolio must-haves, ideal materials, warranty coverage, and expertise in crafting stunning, long-lasting decks across New Zealand landscapes both rugged and serene.
Follow this comprehensive playbook to cut through the noise, avoid cowboys looking to saddle inexperienced buyers, and confidently choose a deck builder who brings the blueprints of your dreams to timber-framed life. Soon you'll transition from a world of planning to relaxing upon a masterfully designed deck - your home's new heart built to stand the test of backyard barbies, impromptu dance parties, and generations making memories yet to come.
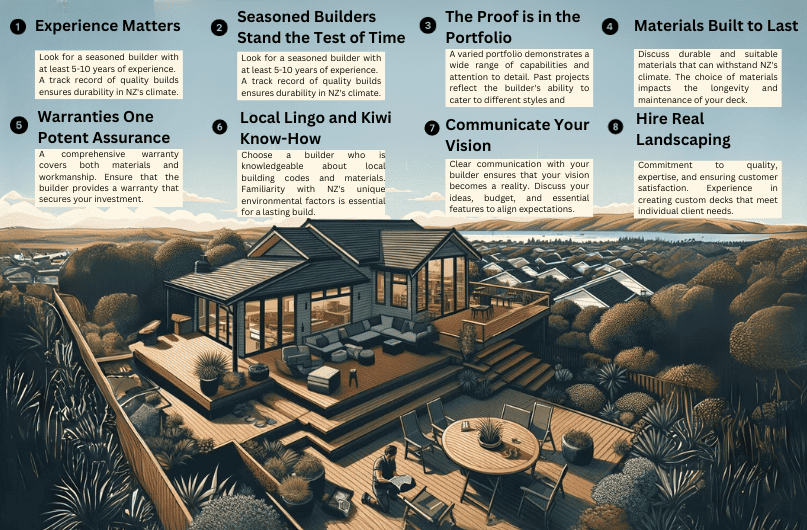
Experience Matters: Seasoned Builders Stand the Test of Time
When choosing a deck builder, don't let a bargain blind you - an inexperienced contractor can end up costing you double in the long run. Seek out seasoned professionals who have been building stunning outdoor living spaces in your region for many years. They have weathered endless Kiwi storms and seasonal shifts, learning the subtleties of local building codes and planning regulations along the way.
Look for a robust portfolio spanning at least 5-10 years in your area. Examine their project list to confirm they have expertise across diverse deck sizes, styles, and materials. Whether you envision a cosy courtyard nook or a sprawling multi-level statement deck, their seasoned skills ensure structural soundness. This protects your investment against New Zealand's occasionally temperamental climate.
Builder longevity also breeds familiarity with council consent processes. Well-versed in local requirements, seasoned deck makers smooth the paperwork obstacles that snag amateur DIY-ers. Their established supplier networks and streamlined work process mean your build stays on track.
While bargains tempt, the true value lies in experience. Proven over years and countless Kiwi decks, seasoned builders apply hard-won mastery to make your outdoor vision an enduring reality. Their expertise allows you to relax knowing your deck meets the highest safety and structural standards - so all you need to worry about is perfecting the barbeque sauce!
Reputation Speaks Louder than a Tui
Before signing on the dotted line, listen to the coos and calls from happy customers. Check recent online reviews to hear testimonials straight from the flock. Pay special attention to the most recent reviews. Have there been any major changes to their service, staffing, or attention to detail? Scan multiple review sites to filter out the squawks and listen for any patterns:
-
Do the bulk of reviews sing praises about their expert craftsmanship, clear communication, and ability to meet deadlines?
-
Do neighbors who are eager to show off their new decks recommend the builder to friends?
-
Does the builder respond professionally to critical reviews, seeking to make things right?
A long, consistent pattern of positive word-of-mouth referrals is a key indicator of outstanding service and nimble responses to life’s inevitable surprises. 5-star reviews may seem as numerous as fantails, but look deeper to ensure that the layers of reviews consistently reinforce one another rather than suggesting the possibility of astroturfing.
A solid reputation built on neighborly chatter, not just anonymous noise, signals whether the builder truly creates spaces where families flock together summer after summer.
The Proof is in the Portfolio
Visuals speak louder than words when evaluating a deck builder. Ask to see examples of their previous work to ensure their skills and style match your dream deck vision. Look for variety in their portfolio showcasing different:
- Deck types and structures
- Elevated
- Multi-level
- Wraparound
- Hillside
- Small spaces, etc.
- Design features
- Built-in benches
- Planter boxes
- Stairs/railings
- Pergolas
- Lighting
- Materials
- Wood types and finishes
- Composite
- Aluminum
Study photographs of finished decks they constructed, imagining yourself enjoying a cup of tea on a cool morning or hosting family for a holiday celebration. The images should spark excitement and align with your desires. Request local references to potentially view completed projects first-hand.
An impressive portfolio indicates advanced abilities to handle complex builds, integrate unique elements like water features or fire pits, and realize client dreams within budget and on schedule. By seeing past works, you gain confidence in the builder’s competency to deliver your ideal backyard escape. Let their talents shine through quality examples finished with care and craftsmanship.
Materials Built to Last: What Works Well in New Zealand's Climate
When investing in a new deck, the materials you choose need to stand strong against New Zealand's dynamic climate - from searing summers to storms that test a builder's skills. Discuss options with your deck pro to find the perfect balance of durability, longevity, maintenance needs, and cost for your home. Here's an overview of popular decking materials used by Kiwi builders:
Treated Pine
- Affordable and readily available.
- Classic look varies from pale yellow to reddish brown.
- Requires yearly sealing/staining to protect from moisture damage.
- Prone to splitting, warping, and mold growth without proper maintenance.
Cedar
- Naturally rot-resistant with beautiful grain patterns.
- Rich reddish-brown color that ages gracefully to silvery grey.
- More expensive than pine but lasts longer.
- Can develop small cracks/splits as part of the natural aging process.
Thermally Modified Timber
- Enhanced through heat treatment to resist rotting and decay.
- Very stable, with little expansion/contraction.
- Eco-friendly option using plantation timber like Radiata pine.
- Fades from brown to silvery grey over first 12 months outdoors.
Composite Decking
- Made of wood fibers fused with plastic/polymers.
- No staining is needed and won't rot, split or warp.
- Gets very hot underfoot in NZ summers.
- Not as natural looking as real timber, with limited color options.
Aluminum
- Extremely durable and weather/fireproof.
- Low maintenance.
- Can dent if subjected to heavy impacts.
- Conducts heat rapidly and can get very slippery when wet.
Discuss the pros and cons with your builder to select materials tailored to your climate, lifestyle and budget. Their expertise with local options ensures your deck stands the test of time.
Deck Cost: Building Your Budget-Friendly Paradise
Constructing a new deck involves more than just fantasizing about relaxing summer evenings - you need to determine your budget. Affordability looks different for every homeowner, so discuss financial constraints honestly with your builder.
Experienced deck builders can get creative to keep expenses manageable, suggesting alternatives like:
- Altering the size, shape, or elevation to reduce materials.
- Using naturally rot-resistant local woods instead of imported composite or aluminum.
- Mixing durable structural materials with budget-friendly alternatives for railings or flooring.
A savvy builder tailors the design to your pocketbook without compromising safety or seismic standards. They will ensure you maximize the beautiful living space allowed per building codes without needless frivolities.
Though tempted by remarkably low estimates, don’t sacrifice quality just to save a dollar. Value enduring craftsmanship and robust materials over minor upfront savings. Building code-compliant structures with inferior workmanship or flimsy wood inevitably requires expensive repairs or full replacement sooner than properly constructed decks. Invest a little more today in sturdy native timber, skilled carpentry and conscientious project management - you'll reap rewards for decades spending evenings dining alfresco with friends, not repairing dry rot damage.
With realistic budgeting and an adaptable deck builder, you can create an outdoor entertaining space that looks and feels custom-designed for your home without breaking the bank. Pay attention to true value over bargain bottom lines, and your new personalized deck adds lasting joy, not regret.
Warranties for Peace of Mind
Even paradise sees storms roll in unexpectedly at times. With a sturdy deck as an extension of your living space, you'll want assurance it can weather whatever comes its way. A strong warranty from your builder gives that peace of mind by guaranteeing their work and standing behind the structural integrity of your investment.
Look for warranties that specifically cover structural defects due to faulty materials or poor workmanship. The industry standard tends to fall around 5 years. A builder who offers a robust structural warranty has confidence in their skills and the quality supplies they use. It also indicates their commitment to making things right if any issues do unexpectedly arise down the line due to their work.
While less vital, additional warranty coverage for things like paint, stains, and coatings can be nice as well. These may fall in the 1-2 year range in many cases. Just recognize that superficial wear and minor aesthetic issues won't compromise the underlying stability and bones that count when it comes to your deck.
Review warranty terms closely and ask questions if anything seems unclear before contract signing. Confirm exactly what is and isn't covered to avoid frustration later. Think through hypothetical scenarios - if x were to happen 5 years from now, would you be protected? Understanding the safety net a strong structural warranty provides lets you rest easy, assured you have trusted backing against unforeseen circumstances as you create memories on your Kiwi deck for years to come.
Local Lingo and Kiwi Know-How
When selecting a deck builder, it's crucial to choose someone fluent in New Zealand building regulations and consent processes. A builder intimately familiar with local codes helps ensure smooth approvals from councils and compliance with strict standards for structure, safety, and aesthetics.
Look for a pro well-versed in the climate challenges unique to New Zealand. Our seasonal extremes, from scorching summers to stormy, wet winters, require durable deck materials that can withstand the elements. Someone knowledgeable about native timber species like kahikatea, rimu, and matai is best equipped to recommend woods that thrive in Kiwi conditions while aligning with your design vision. These experts understand local humidity levels, potential pest issues, and techniques to prevent splitting, warping, and rot in the materials best suited for your deck.
In addition to climate know-how, seek out deck builders with established local relationships. Council liaisons can expedite consent applications, while supply partners ensure prompt access to quality materials. A builder entrenched in your community completes jobs efficiently, pulling from a trusted network of tradespeople and leveraging long-built goodwill to deliver exceptional service.
Partnering with a true local who speaks the vernacular and knows New Zealand building methodologies both financially and philosophically simply makes sense when designing your backyard refuge. Their insight and connections remove obstacles so you can focus on bringing your Kiwi deck dreams to life.
Communicate Your Vision for a Cohesive Project
Bringing your dream deck to life requires open communication and collaboration between you and your builder. Don't hold your vision too close to your chest. Share inspirational photos, your desired aesthetic, special features, and functional must-haves with your prospective builder during consultations.
Discuss the size, layout, and purpose of your deck. Do you plan to entertain large groups or need a more intimate space? Consider flow from indoor to outdoor and how the deck integrates with your existing home. If building off an upper level, inform the builder of potential access issues.
Budget also plays a crucial role in transforming your vision into reality. Be transparent with the builder about your budget constraints. This allows them to tailor the design, materials, and features to stay within your financial parameters. Remember that compromises may be necessary, but a skilled builder can creatively work within your budget.
Keep an open mind when reviewing the builder's suggested plans. A collaboration between their expertise and your aesthetic preferences often yields the best results. Maintain ongoing communication throughout the process, especially regarding any changes that crop up.
By sharing your eyes, ears, and voice, you empower the builder to craft a custom deck that truly reflects your unique vision. With teamwork and transparency, your dream deck can bloom into a beautiful backyard oasis for years of joy.
Why You Should Hire Real Landscaping as Your Trusted Deck Builder?
When it comes to creating your dream backyard paradise, your deck is the centerpiece that ties everything together. Investing in a high-quality deck that meets your unique needs and style is so important - that's why you need to choose your deck builder wisely.
At Real Landscaping, we believe proper deck construction directly impacts how well you can enjoy your outdoor living space. As leading deck builders, we take great pride in crafting custom decks that check all the boxes in terms of functionality, aesthetics, and long-term durability.
Our Commitment to Quality
Unlike most builders who try to complete projects as quickly and cheaply as possible, every deck we create goes through an extensive design and building process to ensure flawless results. We use only high-grade sustainable materials and advanced building techniques that withstand New Zealand's variable climate.
Our team has years of specialized experience crafting stunning decks across the country. We stay up-to-date on the latest industry standards and building codes to construct safe, resilient decks tailored to your property.
A Streamlined Experience
We make the deck-building process effortless through transparent communication, reasonable timelines, and budgets. From initial concept to final inspection, you’ll be involved throughout to personalize every detail. We even take care of securing council permits on your behalf!
Our all-inclusive service and stellar reputation give you complete peace of mind. Just relax as we handle everything needed to unveil your dream backyard paradise.
Future-Proof Investment
Well-constructed decks add tangible value to any home. With Real Landscaping as your deck builder, you can expect to recoup 80-90% of your investment should you sell. Our durable, high-performing decks stand the test of time and enhance enjoyment for years.
Take the first step towards your ideal outdoor living space by getting a personalized quote today! Our team is ready to turn your deck dreams into reality.
Conclusion: Build Your Backyard Paradise
Your dream deck is within reach - all it takes is finding the right deck builder. Arm yourself with the knowledge from this guide to identify experienced professionals with expertise in local building codes and materials. Seek stellar reviews and beautiful portfolios showcasing their signature style. Discuss your budget, warranty, material preferences, and vision to create collaborative plans. With the perfect partner, you'll soon be hosting laughter-filled gatherings on a sturdy, stylish deck - your backyard paradise. Reach out to trusted builders today; your perfect outdoor oasis awaits.
FAQ's
What's the best way to ensure a deck builder has enough experience?
Look for a deck builder with at least 5-10 years of experience constructing decks in your local area. Their portfolio should showcase a wide variety of deck sizes, styles, and materials to confirm broad expertise suited to bring your vision to life. Longevity also indicates familiarity with local building codes and consent processes to keep your project on track.
Why read online reviews before choosing a deck builder?
Reviews provide transparency into builders' quality of service. Look for long histories of positive feedback praising attention to detail, communication and ability to deliver on time and on budget. This community chatter signals whether past clients were thrilled with the whole process. Scan multiple sites to filter out anomalies and listen for any concerning patterns.
What should you look for in a deck builder's portfolio?
A robust portfolio proves technical skills and design talents. Look for images showcasing diverse deck structures, features like built-ins and pergolas, an eye for aesthetics, and mastery finishing builds that stand the test of time. This visual proof gives confidence they can handle your dream deck’s specifications. Request local references to potentially view their craftsmanship in neighborhoods like yours.
How can you build a deck matching your vision while keeping costs affordable?
Discuss budget honestly upfront so the builder can suggest creative ways to provide value through material choices, size adaptations or mixing durable structural elements with less pricey decorative finishes. A flexible, experienced builder tailors the design to your budget without sacrificing safety or quality. Invest a little more in robust materials and skills yielding higher long-term ROI than short-term savings on flimsy components.
What should a deck builder's structural warranty cover?
A 5+ year warranty should cover replacement and repairs for structural defects caused by faulty supplies or poor workmanship. While superficial issues like wood stains aren’t critical, integrity issues that compromise stability indicate shoddy construction. Review terms closely for clarity on what is and isn’t covered. A solid warranty signals conscientious builders' confidence in backing their skills with action if problems arise.
Hiring a landscaping contractor for your home or business is an important decision that can greatly impact the aesthetics, functionality, and value of your property. Before starting any landscaping project, it's essential to ask potential contractors the right questions to ensure they have the experience, skills, and vision to bring your outdoor space to life.
Asking thoughtful questions upfront and doing your research is the best way to avoid disappointments, unexpected costs, and frustration down the road. You want to partner with someone who understands your needs and preferences, communicates well, and can deliver on their promises within budget. Since landscaping projects often represent significant investments of money, time, and effort, you don't want to leave anything to chance.
The questions you ask will reveal important details about a contractor's reliability, expertise, work style, and ability to meet your project goals. Being informed and proactive now can prevent headaches later on. This article will walk you through the top questions experts recommend asking any landscaping contractor before signing a contract or breaking ground. Taking the time to ask these questions upfront is a small investment that can pay off exponentially in peace of mind and satisfaction.
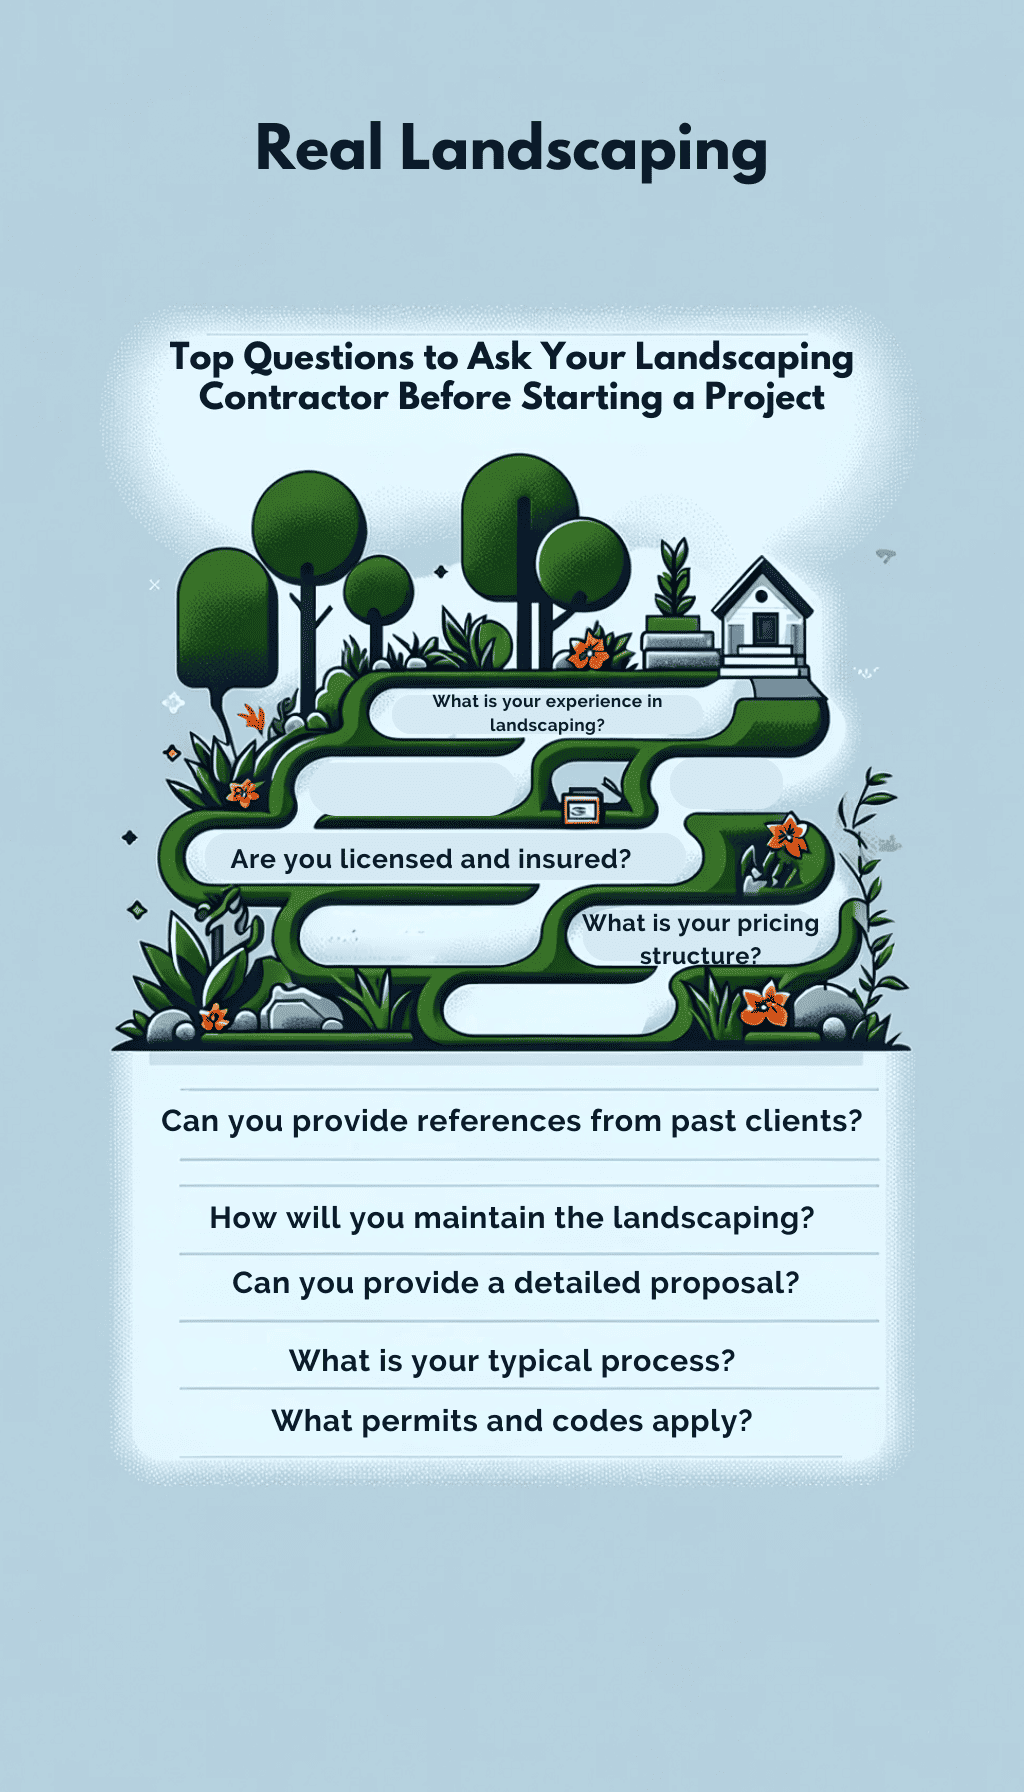
What is your experience in landscaping?
When interviewing potential landscape contractors, it's important to ask about their years in business, previous projects completed, types of services offered, and relevant certifications or training. This helps you evaluate their overall expertise and experience level.
Specifically, you'll want to ask:
-
How long have you been in the landscaping business? Look for companies with several years or more in business. This indicates they have sustainable operations.
-
How many landscaping projects have you completed in the past year? The number of projects completed annually shows their capacity to take on your job.
-
What services do you offer? Look for a full range of services like lawn care, hardscaping, irrigation, lighting, and more. This ensures they can provide comprehensive services.
-
What certifications do you and your staff have? Relevant certifications show investment in continuous training and expertise. Some key credentials are Certified Landscape Technician (CLT) and Certified Landscape Designer (CLD).
The contractor's responses will give you insight into their overall competence, skills, and ability to successfully complete your project. Be sure to ask for details on their experience with projects similar to yours. This helps confirm they have the necessary expertise to handle the unique needs of your property.
Are you licensed and insured?
When hiring a landscaping contractor, it's important to verify they have the proper licenses and insurance to operate legally and protect you from liability. Specifically ask if they have:
-
A business license - This ensures they are registered with the state or local municipality to provide landscaping services. Licensed contractors are more likely to be legitimate, professional operations.
-
Liability insurance - This protects you if a worker gets injured on your property or damages your belongings. Require at least $1 million in coverage.
-
Workers' compensation insurance - This covers medical expenses and lost wages if a worker gets hurt on the job. Without it, you could be held liable for any injuries. Require a certificate of insurance listing you as "additionally insured."
Reputable contractors should happily provide copies of their business license, liability insurance certificate, and workers' comp certificate. Verify that they are current and the coverage amounts are adequate. Avoid any contractor who can't furnish these documents, as that's a red flag they are unlicensed or uninsured.
Proper licensing and insurance show a professional commitment to the trade. It protects you from liability and provides recourse if something goes wrong. Make sure to double check these items for any landscaping project.
Can you provide references from past clients?
One of the most important things to ask a potential landscaping contractor is if they can provide references from past clients. Specifically, you'll want to ask for 2-3 references that you can contact directly to learn about their experiences working with the contractor.
Speaking directly with past clients gives you the opportunity to find out important details about how the project went. For example, you can ask questions like:
- Were you satisfied with the completed work?
- Did the project stay within the initial budget estimate?
- Was the contractor easy to communicate with?
- Did workers show up on time and work efficiently?
- Were there any problems and how were they addressed?
- Would you hire this contractor again?
Strong, positive responses to these types of questions are reassuring signs that the contractor will likely do a good job on your project as well.
On the other hand, if the contractor seems reluctant to provide references or the feedback from references is lackluster, then that may indicate there could be issues if you decide to move forward. The references you speak with should have only good things to say about their experience.
Checking contractor references is a quick, easy way to do some due diligence before committing to a large landscaping investment. Take the time to contact past clients and ensure you choose someone who comes highly recommended.
What is your pricing structure?
When hiring a landscaping contractor, it's important to understand how they charge for their services. Make sure to ask about their rates, get quotes in writing, and inquire about any possible hidden fees.
Some key questions to ask include:
-
Do you charge by the hour or provide a flat project rate? Hourly billing offers more flexibility but can run up costs if the project takes longer than expected. A flat rate helps lock in costs but allows less flexibility.
-
Do you provide free estimates? Reputable contractors should provide a detailed estimate at no cost before starting a project. Beware of giving deposits before receiving a written estimate.
-
What is included in your base pricing? The quote should detail all expected costs including materials, equipment rental, labor, taxes, permit fees, and cleanup.
-
Do you charge for travel time to and from the job site? Some contractors may bill for drive time.
-
Is there a minimum number of hours for a job? Even small projects may have a 2-4 hour minimum.
-
Do you offer discounts for multiple projects? Ask about bundle pricing for doing landscaping in both the front and back yard.
-
Are there additional fees for weekend or evening work? Expect to pay a premium for work done outside normal business hours.
-
Do you have a cancellation policy? There may be a fee if you cancel after a certain point.
-
When is payment due - deposits, progress payments, upon completion? Typical terms are 10-30% down with progress payments.
-
Do you offer payment plans? Some contractors may allow payments spread out over several months.
Getting quotes in writing from 3-4 landscapers allows you to accurately compare pricing. Watch for hidden fees and make sure every expected cost is captured upfront to avoid budget surprises down the road.
What is your typical process?
A landscaping project involves several phases from initial consultation to final inspection. Here is a typical timeline of what to expect when working with a professional landscaping contractor:
Initial Consultation
The process starts with an initial consultation where the contractor will assess your property and goals. This is the time to show pictures of desired outcomes, discuss must-haves and nice-to-haves, and walk the property together. The contractor will take measurements, notes, and photos to put together a detailed proposal.
Proposal and Contract
You'll receive a written proposal outlining the full scope of work, specific materials and plants to be used, project timeline, and itemized pricing. This is when you'll finalize project details and sign a contract. Expect to put down a deposit around 10-25% of the total project cost to secure the contractor's time.
Permits and Preparation
Permits are required for most major landscaping projects. Your contractor will file for necessary permits and handle all coordination. Preparation work such as demolition, grading, irrigation, and site prep may begin during this phase.
Installation
The fun part! This is when the bulk of construction and installation takes place like building garden beds, laying paths and patios, planting trees and shrubs, establishing lawns, and adding water features. The project manager will be onsite directing the work and available for any questions.
Inspections and Completion
Throughout the project, there will be inspections by the contractor and city officials. Once everything passes inspection and the job is complete, the property will be photographed for your records. At this stage, you'll pay any remaining balance and schedule a final walkthrough.
Maintenance and Follow-Up
Many landscape companies offer regular maintenance services to keep your property looking fresh. Follow-up care like pruning, fertilizing, weed control, and replacements under warranty may be provided for a period after completion.
Ongoing communication, prompt responses, and adherence to the timeline are expected throughout the process. Reputable contractors will partner with you from concept to enjoyment of your finished outdoor oasis.
How will you maintain the landscaping?
Maintenance is an important consideration for any landscaping project. Be sure to ask your contractor about:
-
What maintenance services they provide. Do they handle all aspects of ongoing landscaping maintenance themselves? Or will you need to do some upkeep and maintenance on your own?
-
Warranties. Many contractors offer warranties on plants, trees, and other materials installed. This protects against defects and ensures replacements if something dies shortly after planting. Find out what is covered under warranty and for how long.
-
Responsibility for upkeep. Clarify who will be in charge of watering, pruning, weeding, mowing, fertilizing, and other regular maintenance tasks. Will the contractor provide these services for an additional fee? Or is the ongoing upkeep solely the responsibility of the homeowner after the initial installation?
-
Seasonal maintenance needs. Landscapes have different requirements during different seasons. Discuss what maintenance must be done at specific times of year. For example, preparing gardens for winter with mulch and pruning trees/shrubs at the right time for optimal health.
Knowing the maintenance plan ahead of time ensures your landscaping continues looking its best year after year. A reputable contractor will have clear policies about what they handle versus what you'll be responsible for.
What permits and codes apply?
When undertaking any landscaping project, it's important to understand what permits and codes may apply in your area. Depending on the scope of work, you may need approval from your local zoning board, permits from the town or city, or have to adhere to landscaping ordinances.
Some common things to investigate include:
-
Zoning regulations - Most areas have zoning laws dictating where certain plants can be placed, height restrictions, and setbacks from property lines. Your landscaper should know these and design accordingly.
-
Digging/excavation permits - Major digging, trenching, or grading work often requires permits. Your landscaper can file these permits and ensure inspections.
-
Building permits - If adding structures like decks, pergolas, or pools, building permits are likely needed. Your contractor can handle this process.
-
HOA/community rules - If part of a homeowner's association, make sure your plans conform to any CC&Rs or architectural guidelines.
-
Stormwater management - Drainage and runoff may be regulated, especially for larger projects. Proper grading, rain gardens, and drainage are important.
-
Tree removal - Taking down mature trees sometimes requires a permit or replacement specifications.
-
Noise and work hours - Most areas prohibit loud machinery during overnight hours or on weekends.
Thoroughly discussing permits and codes with your contractor ensures your project complies with local regulations and avoids any violations down the road. Check with your city planning office if unsure what rules apply.
Can you provide a detailed proposal?
A detailed proposal from your landscaper is essential to outline project details, costs, timelines, and other expectations. This helps prevent miscommunication down the line.
Make sure to get any proposal or contract in writing before work begins. The proposal should clearly define:
-
The scope of work. This includes specifics on what landscaping services will be performed, materials provided, areas to be addressed, and any exclusions.
-
A project timeline estimating start and completion dates. Ask how long each phase will take.
-
Itemized costs and payment terms. Get quotes for materials, labor, fees, taxes, permits, and any other expenses. Understand payment schedules and policies.
-
Contractor responsibilities. Specify who is responsible for cleanup, hauling away debris, project management, inspections, and more.
-
Your responsibilities as the client. This may include securing permits, clearing areas, marking underground utilities, etc.
-
Warranties provided on workmanship or plantings. Length and coverage details.
-
Communication plans. How will you be updated on progress? Who should you contact with questions or concerns?
Having all expectations mapped out clearly in the proposal reduces the chances of misunderstandings later on. It also provides documentation you can refer back to throughout the project. Before signing any proposal, review it carefully and ask questions to fill any gaps.
Conclusion
Hiring a professional landscaping contractor for your outdoor project is a crucial decision that requires careful consideration. By asking the right questions upfront, you can gain valuable insights into a contractor's experience, skills, process, and pricing to determine if they are the right fit for your needs.
Real Landscaping is a trusted resource for connecting residents of New Zealand with local, reliable, and experienced landscapers who provide top-quality services at competitive prices. Our contractors offer a wide range of services, such as artificial grass installation, deck building, retaining walls, garden edging, irrigation systems, hydroseeding, landscape design, garden paving, and gardening services.
By focusing on important questions about a contractor's expertise, track record, licensing, insurance, references, pricing structure, typical process, maintenance services, code compliance, and detailed proposal, you can ensure a successful outcome for your outdoor project. Taking the time to have an in-depth discussion and get details in writing can help avoid frustrations down the road.
Do your due diligence to hire the best landscaping contractor for the job. An experienced pro who communicates follows best practices, and tailors their services to your property's unique needs is key to achieving your landscaping vision and getting a garden you'll love. With Real Landscaping, you can hire with confidence knowing your contractor has the qualifications and capabilities to complete your outdoor project. Check out our services and request a quote today.
Limited backyard space is a common challenge for many homeowners. With a small yard, it can be difficult to fit in all the features you may want, like a patio, play area, garden beds, and more. This leads to backyards feeling cramped and cluttered.
Retaining walls offer an excellent solution to maximize limited backyard space. Retaining walls are sturdy structures used to hold back soil and create visible "steps" or terraces in your yard. This allows you to sculpt the landscape and create more functional zones within a small footprint. For example, you could build a retaining wall to add a raised patio area, plant beds, or extra play space in the same amount of square footage. With smart design, retaining walls transform restrictive backyards into ultra-functional outdoor living areas.
In this guide, we'll walk through how to use retaining walls to open up limited backyard space. We'll cover planning, materials, shapes, adding stairs and seats, drainage considerations, installation, decorating tips, and more. With some thoughtful planning and elbow grease, you can gain a spacious, beautiful backyard that makes the most of every centimeter.
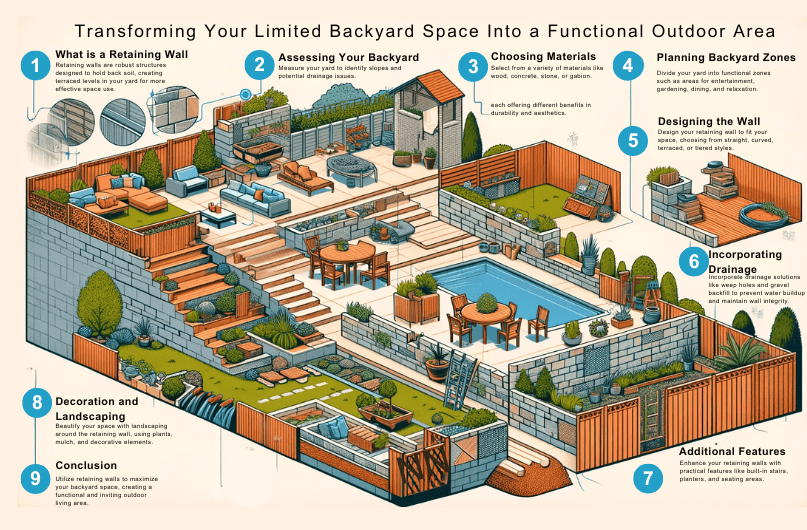
What is a Retaining Wall?
A retaining wall is a structure designed and constructed to resist the lateral pressure of soil or other material retained by it.
The primary purpose of a retaining wall is to hold back or retain soil, rock, or other material behind it and prevent it from sliding or eroding. Retaining walls serve several functions:
- Prevent downslope movement or erosion of soil
- Hold back soil for terracing or leveling a landscape
- Support vertical grade changes in the landscape or changes in elevation
- Reinforce steep slopes and prevent possible landslides
- Channel water or control drainage
Retaining walls are typically made from materials like:
- Concrete
- Stone
- Brick
- Timber
- Metal
The material used depends on the application, load requirements, lifespan desired, and aesthetic preferences. Concrete retaining walls are extremely strong, durable and low maintenance. Natural stone and bricks provide an attractive, traditional look. Timber can work well for low-medium height walls but requires maintenance. Metal retaining walls are lightweight but can be more expensive.
The design, size and reinforcement of the retaining wall depends on the material, the weight and pressure of the soil, and the total height and length of the wall. Proper engineering is crucial to ensure structural integrity and stability.
Assess Your Current Backyard
The first step in maximizing your limited backyard space is to take measurements and assess what you're working with. This will allow you to identify any slopes, levels, drainage issues, or other problem areas that can be improved with retaining walls.
Start by measuring the overall dimensions of your yard - length, width, and total square footage. Then take measurements of any existing hardscaping like patios, walkways, and decks. Be sure to account for stairs, pathways, gardens, and any other features taking up space.
Pay close attention to any slopes or elevation changes in your yard. Use a level tool to identify the degree of incline. Mark the high and low points and measure the total rise or drop in elevation. Having a visual sense of the slope will help plan where retaining walls can be used to create flatter usable space.
Also make note of drainage problem areas, low spots where water collects after rain, or areas where soil erosion occurs. Retaining walls can route and control water flow to prevent these issues.
Sketch out a basic layout of your yard with the key measurements and slope markings. This bird's-eye view will serve as your planning map for building retaining wall levels.
Taking time to assess the nooks, slopes, and problem spots in your current backyard is an important first step to maximizing the space. With a layout map in hand, you can strategically plan where to add retaining walls to open up usable square footage.
Plan Out Backyard Zones
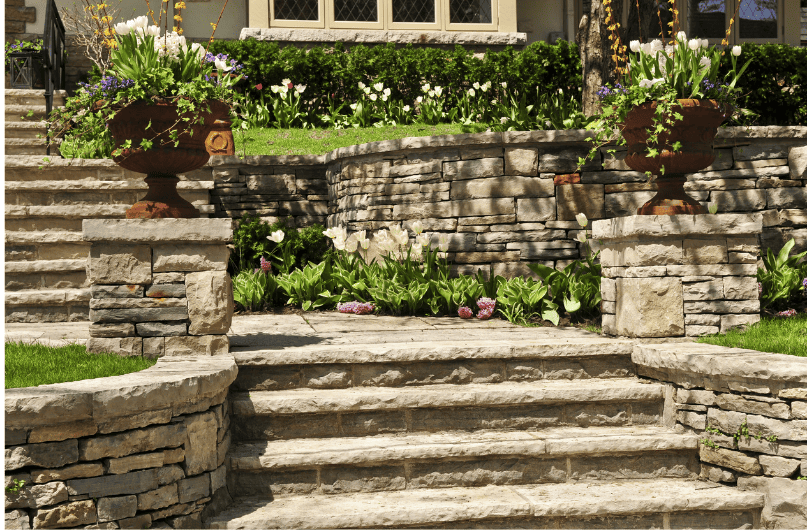
When planning your backyard design, think about dividing the space into different zones or areas based on usage. Here are some typical backyard zones to consider:
Entertainment Zone
The entertainment zone is an area to gather with family and friends. This could include a patio, deck, or pergola outfitted with outdoor furniture, a fire pit or fireplace, a barbecue grill, and other amenities. Position this zone near the backdoor for convenience.
Play Zone
Designate a play zone for kids or pets to safely run around and burn energy. Install play equipment like swings, a playhouse, a sandbox, or a climbing structure. Make sure to allow enough open space for games and activities.
Garden Zone
Create a garden zone for growing flowers, herbs, vegetables or fruit trees. Gardens add color, texture, scents, and edible ingredients to your backyard. Site the garden in a sunny spot and include compost bins, sheds, raised beds, or other gardening features.
Relaxation Zone
Have a quiet spot to retreat to alone or with a book. This might include a paved area with comfy chairs, hammocks, or swings. Use screens, trees or shrubs to block views and create a sense of privacy and peace. Position away from noisy zones.
Dining Zone
An al fresco dining area lets you enjoy backyard meals. Set up a weather-resistant table and chairs on a flat surface. Locate near the entertainment zone for easy service. Consider adding decorative strings lights, lamps, or candles to create ambiance after dark.
When laying out zones, think about traffic flow between areas and how people will circulate. Align borders and transitions to promote movement. Maximize limited space by allowing zones to overlap as needed.
Choose Retaining Wall Materials
When choosing materials for a retaining wall, there are several options to consider including wood, concrete, stone, and gabion baskets. Each material has pros and cons to weigh when deciding what will work best for your backyard vision and budget.
Wood
Wood retaining walls provide a natural, rustic look that can blend into landscaped surroundings. Cedar is a rot-resistant wood that makes good retaining wall materials.
-
Pros: Wood is relatively affordable and easy to work with. It's a lighter material that doesn't require heavy equipment for installation. Wood walls can be designed in curving shapes.
-
Cons: Wood is susceptible to rotting and insect damage. It requires regular maintenance like sealing or staining. Wood retaining walls don't last as long as stone or concrete.
Concrete
Concrete makes a strong, durable retaining wall that can be molded into shapes during installation. The material is versatile and available in various textures and colors.
-
Pros: Concrete stands up well to the elements and has a long lifespan. Textured concrete provides a natural stone look. Concrete is a good structural support material.
-
Cons: Concrete is more expensive and requires professional installation. The molds create a uniform look lacking in natural variation. It can crack over time and require repairs.
Stone
Natural stone like granite provides an attractive, classic retaining wall look. Irregular stones can create a mosaic, mosaic effect.
-
Pros: Natural stone is extremely durable, lasting for decades. Granite and other stones have unique color variations for visual interest. Loosely stacked stones allow planting in gaps.
-
Cons: Quarried stone is very expensive. Stone installation requires heavy equipment and expertise. Irregular stones make a less uniform appearance.
Gabion Baskets
Gabion baskets filled with stones provide a unique, rustic aesthetic for retaining walls. The wired baskets are flexible and drain well.
-
Pros: Gabions are permeable for drainage and can curve to landscape contours. They create a natural effect with loose stone fill. Gabions don't need a concrete foundation.
-
Cons: Gabions are more labor intensive to construct. The baskets are not as structural as solid retaining walls. The wire will eventually corrode and require replacing.
Consider longevity, cost, and aesthetics when weighing these options. Consult with a landscaping professional to determine the best materials for the height and contours of your retaining wall project. Think about ongoing maintenance requirements as well. With thoughtful planning, you can create a retaining wall that maximizes backyard space with style.
Design the Retaining Wall Shape
The shape of your retaining wall can dramatically transform the look and functionality of your backyard. Consider the natural contours and layout of your yard, and how different wall shapes can enhance certain zones or divide spaces. Some popular options include:
Linear
A straight retaining wall is the simplest option. It works well for creating a flat yard space on a slope or supporting raised garden beds. Make sure to position it thoughtfully to open up usable flat ground rather than closing things off.
Curved
Curved and serpentine walls add visual interest and can soften harsh angles. A curved wall around a patio or seating area creates an embracing shape and intimate feel. The curve can even increase garden space on the slope above.
Terraced
For yards with multiple elevation changes, consider a terraced retaining wall design. This uses stacked walls to create planted areas between flat zones. It maximizes both living and recreation space through smart vertical divisions.
Tiered
Tiered walls work nicely in narrow gardens, essentially creating garden boxes that step down the slope. Each tier can have its microclimate and plantings. Tiers also provide additional seating within the wall. Think stadium seating in your backyard!
Take time to map out ideas with spray paint or garden hose on the actual ground. This allows you to visualize shapes and align the wall design seamlessly with your yard's unique contours and features. Get creative with the shapes to amplify both beauty and functionality.
Add Stairs, Planters, and Seating
Retaining walls allow you to create multi-level spaces while also providing opportunities to integrate functional and decorative features. Consider adding stairs, planter boxes, and built-in seating to enhance the usability and visual appeal of your backyard.
Stairs are essential for navigating between the different levels in your yard. Position sturdy steps in convenient locations for easy access up and down the retaining walls. Ensure the stair treads are deep and wide enough for safe use. Add railings for additional support if the stairs are tall.
Planter boxes built into the retaining wall bring greenery within arms reach. Choose flowers, herbs, or vegetables to plant in the built-in garden beds based on the sunlight exposure. Use decorative planter boxes to accent the wall design. Include integrated irrigation or ensure the planters are within reach of a hose.
Built-in benches and seating nooks tucked into the retaining wall provide a place to relax and enjoy the yard. Line benches with cushioned pads or waterproof cushions for comfort. Position benches to take advantage of shade or views. Add side tables for holding drinks and snacks while lounging in the multi-level backyard retreat.
With some thoughtful planning and design, integrating stairs, planters, and seating into the retaining wall allows you to maximize both form and function in your backyard. These features enhance the usability of the space for recreation, gardening, and entertainment.
Incorporate Drainage
Proper drainage is crucial for retaining walls to prevent buildup and structural damage over time. Here are some tips for incorporating drainage into your retaining wall design:
- Install weep holes along the bottom course of blocks to allow water to escape from behind the wall. Weep holes are essential for drainage and should be placed every 0.9-1.8 meters along the base.
- Backfill behind the wall with gravel, not soil. Gravel allows water to easily flow through, while soil will retain moisture and lead to pressure on the wall. Use coarse gravel like 20mm crushed rock.
-
Slope the ground behind the wall back and away from the wall at a minimum gradient of 5% or more. This allows the water to run off away from the wall and not pool.
-
If using geogrid reinforcement, make sure it does not block weep holes or prevent drainage through the backfill gravel.
-
Optionally, install a perforated drainage pipe behind the base of the wall to direct water away. Drainage pipes connected to weep holes are useful for longer walls or very wet environments.
-
For wooden retaining walls, incorporate gravel backfill and drilling weep holes at the base as well. Treated lumber is recommended for durability.
Proper drainage considered during design and construction is crucial for retaining walls to function properly long-term without becoming damaged from the pressure of built-up water behind them. Incorporate gravel backfill, weep holes, sloping, and optional drainage pipes.
Prepare the Installation Site
Before starting construction on your retaining wall, you'll need to prepare the installation site. Proper site preparation is crucial for ensuring a stable wall that will stand the test of time. Here are the key steps:
-
Level the ground - The ground where your wall will be built needs to be as flat and level as possible. Use a shovel, rake, and leveling tools to remove any humps or depressions. Address any severe slope issues before building.
-
Clear away debris - Remove any large rocks, roots, sticks, and other debris from the installation area. These can prevent proper compaction or lead to future sinking issues if left in place under the wall.
-
Mark the layout - Use spray paint or stakes to mark the layout of your wall design on the ground. Refer to your plan to determine the footprint. This will help guide the build.
-
Call underground utilities - If there are any underground electrical, gas, water or sewer lines in the dig area, call the relevant authorities before excavating to get them properly marked. Avoid puncturing these lines during the build.
Proper site prep provides a solid, stable foundation for an enduring retaining wall that withstands the elements. Don't rush this important first step when installing your new backyard wall.
Build the Retaining Wall
Carefully follow the design plans and material specifications when building the retaining wall. Proper installation is crucial for structural integrity and longevity.
Be sure to use the recommended construction adhesive between any layered blocks or stones. Check that each row is level across the entire expanse. Use a tamper to compact the fill dirt behind each tier as you go up. This is key for stability.
Backfilling correctly behind the wall is critical. Fill up to 15 cm behind the wall with free-draining gravel or crushed rock. Pack down firmly. Then place your regular fill dirt on top. The gravel layer provides drainage to prevent water pressure buildup behind the wall.
Install weep holes at about 1 meter intervals at the base of the wall. These openings let moisture drain out from behind. Protect weep holes with landscape fabric to prevent clogging.
Building a safe, secure retaining wall takes patience and care. Follow all specifications and allow time for proper curing of any adhesive or backfill. The result will be a long-lasting, functional backyard focal point.
Decorate and Landscape
After your retaining wall is built, it's time to decorate and landscape to complete your backyard oasis. Here are some ideas for finishing touches:
Add Plants
- Choose plants suited to the New Zealand climate that will thrive in the new garden beds created by the retaining wall. Consider native plants like Pohutukawa, Kowhai, and Hebes, as well as New Zealand flaxes, succulents such as Coprosma, flowering perennials like Chatham Island Forget-Me-Not, climbers and vines like Clematis, shrubs like Pittosporum, and small trees like Cabbage Trees (Cordyline australis).
- Plant along the top of the retaining wall to soften the edges. Trailing plants look great cascading down the wall sides.
- Add potted plants and container gardens for flexibility. Go for a cohesive look by using pots in the same color, material, or style.
Add Mulch
Cover any exposed dirt areas with 5-7.5 centimeters of mulch. Mulch helps retain moisture, prevents weeds, and gives a polished look. Opt for natural mulches like wood chips, pine needles, bark, or dark colored rocks.
Install Lighting
- Add landscape lighting along the retaining wall and throughout garden beds to create an ambiance for nighttime enjoyment. Go for path lighting, step lighting, or uplighting.
- String lights also lend a magical touch. Drape them along the top of the wall, overhangs, trees, or pergolas to create a captivating atmosphere in your New Zealand backyard setting.
Add Art and Decor
Personalize with garden art, sculptures, decorative pots, wind chimes, and other accents that reflect your Kiwi style. Paint or stencil designs onto the retaining wall to make it a backdrop. Hang wall art, mirrors, or create a living wall of New Zealand native plants.
With strategic plants, mulch, lighting, and art, you can fully leverage your retaining wall to create an inviting backyard oasis even in a small space. Get creative and have fun decorating, bringing the magic of Aotearoa into your backyard!
Conclusion
Retaining walls are an exceptional solution to enhance limited backyard spaces, adding functionality, and creating remarkable nooks even in the smallest yards. In this guide, we've shed light on the versatility of retaining walls and how they can help optimise backyard spaces of any shape and size here in New Zealand.
Don't settle for a plain, limited backyard. With the correct retaining wall system designed and installed by the professional team at Real Landscaping, you can transform even the most compact land plot into a beautiful, purposeful oasis. Our experts sculpt your landscape with retaining walls that not only add aesthetic appeal but also value to your property.
We provide durable retaining walls that Kiwis rely on, guaranteeing safety, longevity, and effectiveness. Our experts possess the necessary expertise and skill for the correct installation of these landscaping elements, and they ensure your new wall complements and enhances your overall landscape design.
Reach out to us today to discover how retaining walls can help you maximise your outdoor living space. Remember, the only limit is your imagination! With our professional help at Real Landscaping, let's unlock your garden's potential and transform your landscape dream into reality.
Artificial grass, also known as synthetic turf, refers to man-made surfaces made to emulate natural grass. It is most often used in sports arenas and residential landscapes. The origins of artificial grass date back to the 1960s when it was first created as a substitute for natural lawn by a team headed by David Chaney. Their synthetic grass was made of nylon implanted with blades of green plastic to resemble grass. It was first installed in the newly constructed Houston Astrodome in 1966 due to difficulties growing natural grass indoors under artificial lighting. This pioneering artificial turf was called "Chemgrass."
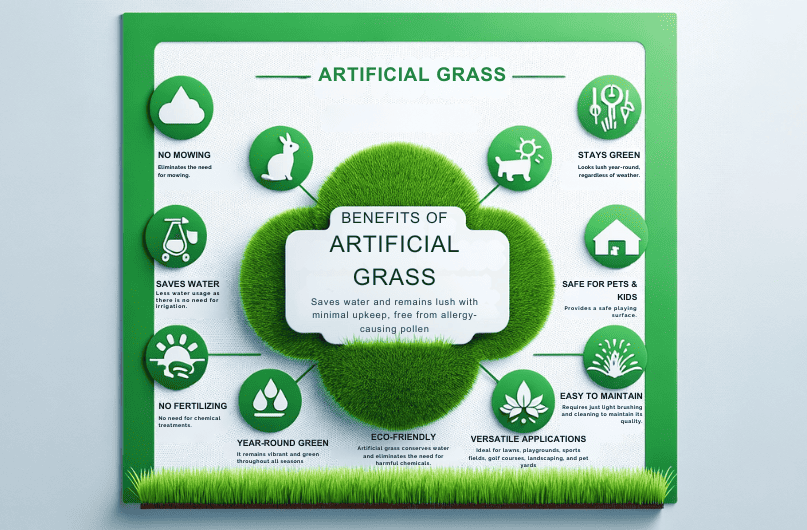
Since then, artificial grass technology has continued to advance. The materials used have evolved from nylon and plastic to more sophisticated polyethylene and polypropylene materials. Manufacturing techniques have also improved to produce blades that are more realistic and durable. Today, artificial grass is becoming increasingly popular for residential and commercial applications as a low maintenance, environmentally friendly alternative to natural grass. From sports fields to backyards, artificial turf offers benefits like constant green color, durability, and water savings. This guide provides a comprehensive overview of artificial grass for homeowners considering installing it in their landscape.
Advantages of Artificial Grass
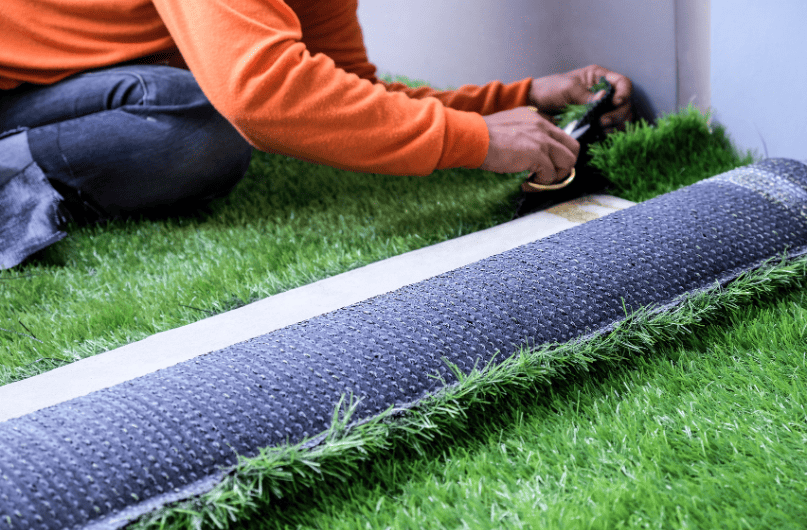
One of the biggest advantages of artificial grass is that it requires very little maintenance compared to real grass. Once artificial turf is installed properly, it does not need to be watered, mowed, or fertilized. The synthetic blades retain their fresh, green appearance year-round regardless of weather conditions.
Artificial grass also provides a lush, attractive look that resembles a natural grass lawn. The newest turf products feel soft underfoot yet are durable enough for active play. The quality synthetic fibers are designed to emulate the texture and appearance of real blades of grass. Many homeowners are unable to tell the difference from a distance.
The built-in drainage systems in artificial turf allow rainwater to pass through quickly so the lawn does not get muddy or flooded. This makes artificial grass a safe, clean, and comfortable surface for kids and pets. There are no muddy paws or grass stains to worry about. Due to its low maintenance nature, artificial grass offers homeowners more time to enjoy outdoor living spaces without labor-intensive lawn care.
Cost Savings
One of the biggest advantages of artificial grass is the cost savings compared to natural grass. With artificial turf, there is no need for regular mowing, watering, or fertilizing. These services can add up over time and be a continual expense for homeowners.
Artificial grass only requires an occasional rinse to keep it looking clean, saving you time and money on lawn maintenance over the years. The upfront installation cost of artificial turf may be more than sodding a new lawn, but artificial grass has a lifespan of 15-25 years depending on the quality. This longevity makes it cheaper in the long run compared to repeatedly re-sodding and renovating a natural grass lawn every 5-10 years.
Additionally, artificial lawns retain their vibrant green color regardless of weather conditions. Natural grass can turn brown during hot, dry periods requiring extra watering costs. If you live in a region with water restrictions, artificial grass is an especially good choice since it doesn't need irrigation after installation.
With artificial turf, you'll no longer have surprise costs from lawn care services or wasted water keeping natural grass green. The durable artificial blades withstand heavy use and retain their appearance better than real grass under high traffic. While the installation cost is an investment, artificial grass saves substantially on regular maintenance and avoids the need for repeated renovations over time.
Environmental Benefits
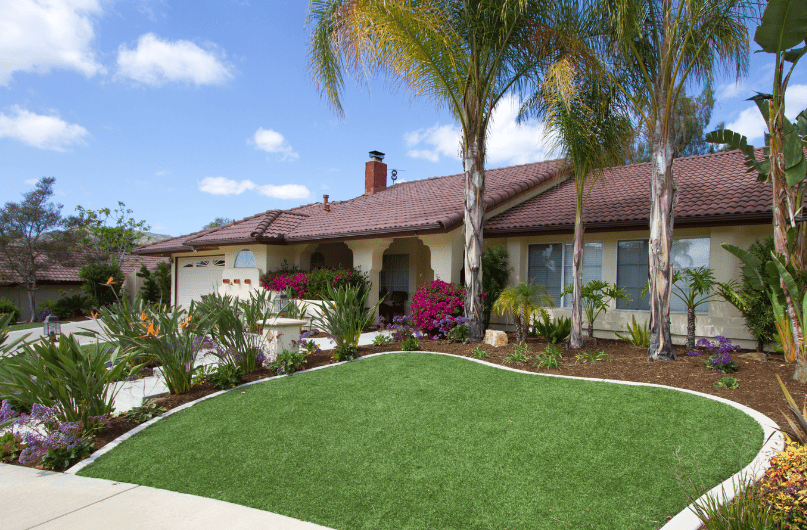
Installing artificial grass provides a number of environmental benefits compared to natural grass lawns. Artificial turf significantly conserves water usage since it does not require regular irrigation or watering to stay green and lush. This can lead to substantial cost savings on your water bill over time.
Additionally, artificial grass eliminates the need for pesticides, fertilizers, and other chemicals that are commonly used on traditional lawns. Runoff from these products can pollute local waterways and contribute to environmental degradation. Going with a synthetic turf helps protect the health of nearby ecosystems.
At the end of its lifecycle, artificial grass can also be fully recycled and kept out of landfills. The polyethylene fibers are broken down and reused to create new products, reducing waste. Natural grass clippings and debris inevitably end up in the dump.
By installing artificial grass, homeowners can benefit the environment through reducing water usage, eliminating lawn chemicals, and decreasing waste. Your outdoor space remains beautiful and lush while protecting local ecosystems and resources.
Versatile Applications
One of the best features of artificial grass is that it can be used in so many different applications, both for residential and commercial uses. Unlike natural grass that works best for lawns and yards, artificial turf can be used to create stunning landscapes in settings that real grass just won't work.
Lawns
For homeowners, artificial lawns are an excellent alternative to natural grass for their yards and lawns. The artificial blades perfectly recreate the look of lush, green grass without any of the mowing or watering required for the real thing. Artificial lawns are durable enough to handle all kinds of activity, from kids playing to backyard barbecues and patio furniture. The synthetic grass allows homeowners to enjoy a perfect looking lawn year-round regardless of weather or climate.
Playgrounds & Sports Fields
Beyond home lawns, artificial turf is also the ideal surface for playgrounds, sports fields, and athletic facilities. The synthetic blades are soft and cushioned enough for children's playgrounds as a safe alternative to wood chips, sand, or pea gravel. For sports like football, baseball, field hockey, and more, artificial turf allows year-round use regardless of weather. The consistent surface is safer for athletes and allows for truer bounces and rolls of balls. Artificial grass doesn't get muddy or freeze over, so games and practices can continue even when natural grass would be unusable. The low maintenance requirements also make artificial turf perfect for schools and recreational facilities.
Other Landscaping
Artificial grass isn't just for lawns and sports fields. Many homeowners choose to use artificial turf for landscaping areas like gardens, patios, walkways, and poolsides. The synthetic material adds a lush, green touch while still allowing other plants like flowers and shrubs to thrive. Using artificial grass in landscaping allows homeowners to cut back on water usage while still enjoying the beauty of green spaces. For areas like golf courses, parks, attractions, and more, artificial grass offers unlimited possibilities for creative and lush landscaping designs that would be impossible to maintain with natural grass.
Allergen Free
Unlike natural grass which produces pollen and irritates allergy sufferers, artificial grass is allergen free. With no grass blades or pollen, artificial lawns won't trigger any allergic reactions or asthma. This makes artificial grass a great option for anyone with grass allergies, seasonal allergies, or respiratory issues aggravated by pollen. Kids and adults who suffer from hay fever, allergies, and asthma can play on an artificial lawn without worrying about stuffy noses, itchy eyes, rashes, or breathing issues. An artificial grass lawn provides a safe outdoor space for the whole family to enjoy.
Pet Friendly
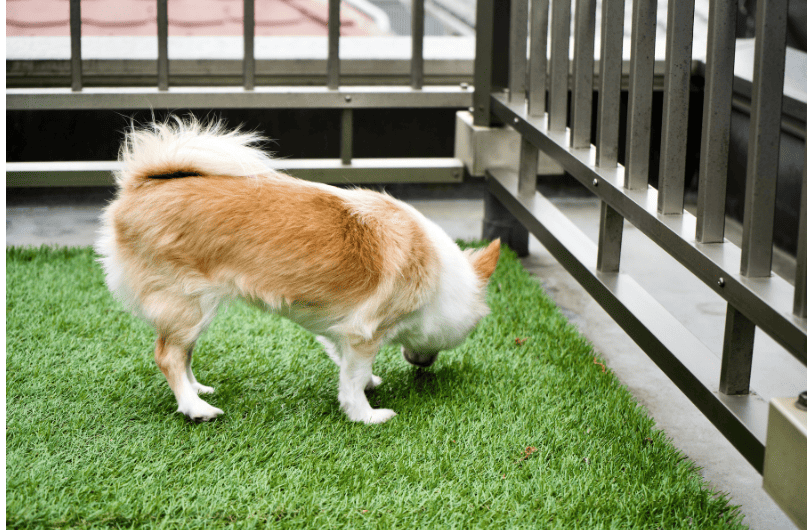
Artificial grass is highly durable and stands up well to pet traffic and activity. Unlike natural grass, it won't get muddy or turn into dirt patches from excessive pet use. Artificial turf is designed to replicate the look and feel of real grass, while being much more resilient.
Pet messes are also no problem with artificial grass. Urine drains through the turf and away from the sub-surface, so it doesn't leave unsightly yellow spots or lingering odors. Any solid pet waste can be easily removed and the grass hosed off. The artificial blades do not absorb liquids or stains like real grass does. This makes artificial lawns much simpler to clean and maintain with pets.
Artificial grass offers a clean, attractive and comfortable surface for dogs and cats to play and do their business on. Pet owners don't have to deal with constantly repairing dug up areas or replacing grass worn down by pets. Their animals can enjoy an outdoor space made just for them.
Safer for Kids
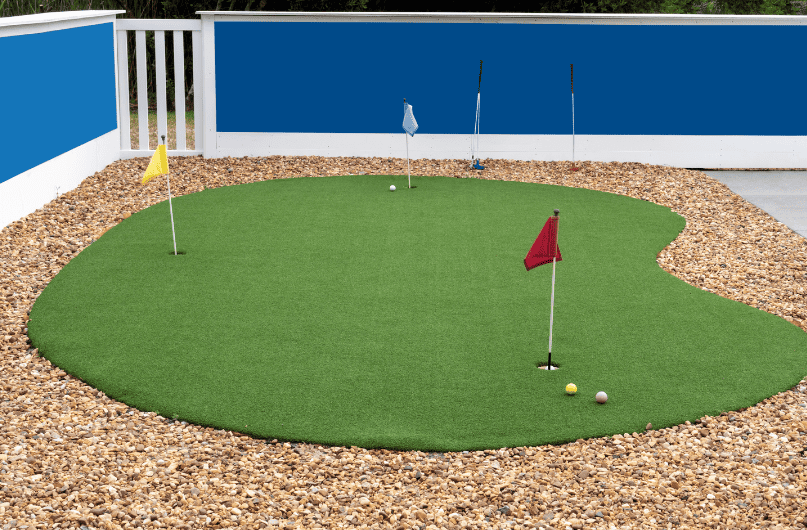
Unlike regular grass, artificial turf does not require the use of pesticides or fertilizers, making it a safer option for kids who may ingest or come into contact with the harmful chemicals on regular grass. Artificial turf is made from non-toxic materials and does not pose a risk of exposure to pesticides or fertilizers.
Additionally, artificial turf provides a cushioned surface that helps prevent injuries. The fibers of artificial grass provide a soft and cushioned surface when kids take tumbles and fall, reducing the risk of scraped knees, elbows, and heads that come with harder natural grass or concrete surfaces.
Many artificial grass manufacturers design their products with safety top of mind, using materials intended to mimic the play experience of natural grass while avoiding the risks that can come with real grass. With proper installation and maintenance, artificial turf can be an ideal surface for kids to play. The lack of fertilizers and pesticides combined with cushioning from the turf fibers and infill make artificial grass a safer option compared to natural grass or other hard surfaces.
Installation
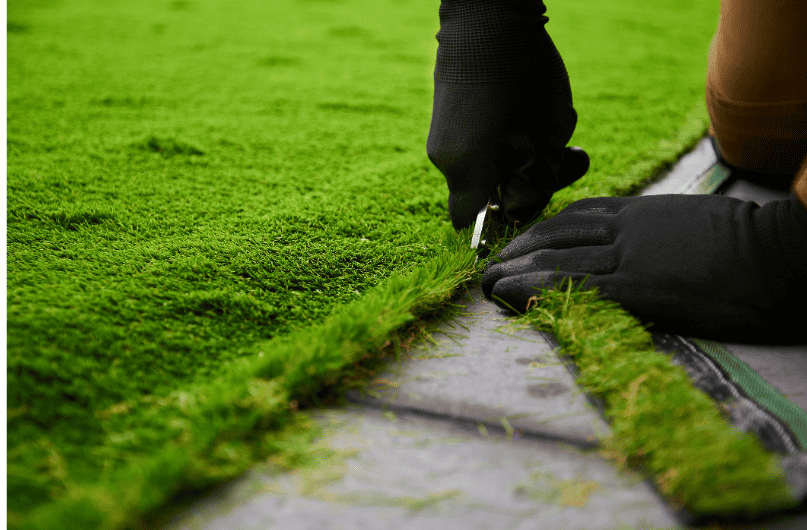
Real Landscaping is your go-to service provider for professional artificial grass installation. With vast experience in the industry, our skilled team ensures your artificial lawn is not only visually stunning but also long-lasting and low-maintenance.
We take pride in our meticulous attention to detail, and our comprehensive installation process includes the following steps:
Prepare the Base
At Real Landscaping, we understand that proper base preparation is crucial to the overall appearance and longevity of your artificial turf. We expertly dig out the area to an appropriate depth, remove any plants, roots, stones, and debris, and compact the soil until it's entirely flat and even. Our team also installs and compacts an appropriate aggregate base, ensuring the finished surface is perfectly smooth and slightly above surrounding surfaces.
Install the Turf
We make sure the artificial grass is acclimated to the temperature before installation. Our team carefully trims and stretches the turf to fit your unique area, secures the edges with landscaping stakes, and meticulously cuts and glues seams between pieces for a flawless finish.
Fill the Infill
To give your artificial grass the necessary weight and support, our team uses clean silica sand and rubber granules specifically designed for this purpose. Following a standard mixture ratio, we use a drop spreader to evenly distribute the infill, ensuring the turf fibers stand upright and maintain their structural integrity.
Allow to Settle
Real Landscaping is committed to your satisfaction. After installation, we monitor the artificial grass to ensure it compresses and settles correctly with the infill. Our team is attentive to any uneven areas and will top up infill as needed to maintain a consistently lush appearance.
Choose Real Landscaping for professional artificial grass installation services. We guarantee exceptional quality, longevity, and aesthetics that will elevate your outdoor living experience.
Maintenance
One of the major benefits of artificial grass is the low maintenance required compared to natural lawn. While completely maintenance-free grass doesn't exist, caring for artificial turf is simple and straightforward.
With just a few minor tasks, artificial grass will retain its fresh, lush appearance for years. The maintenance required depends on the amount of traffic, but most artificial lawns need:
- Occasional cleaning - Removing debris like leaves, twigs and dirt keeps the grass looking tidy. A broom, rake or leaf blower easily handles light cleaning. For a deeper clean, use a hose on low pressure or a deck brush with water and mild soap.
- Brushing - Over time, persistent foot traffic can cause the blades to flatten down. Running a stiff brush over the grass brings the blades back up. Brushing also redistributes the infill.
- Raking infill - The small granules between the blades, known as infill, compact down with use. Raking with a stiff bristled broom spreads the infill evenly again. This maintains the cushioning and keeps the grass upright.
With proper installation and just a few minutes each week for these tasks, artificial grass remains lush and green while natural grass would require frequent mowing, watering, fertilizing and treatment for weeds or pests. The minimal effort makes artificial turf the low maintenance option.
Choosing Quality Turf
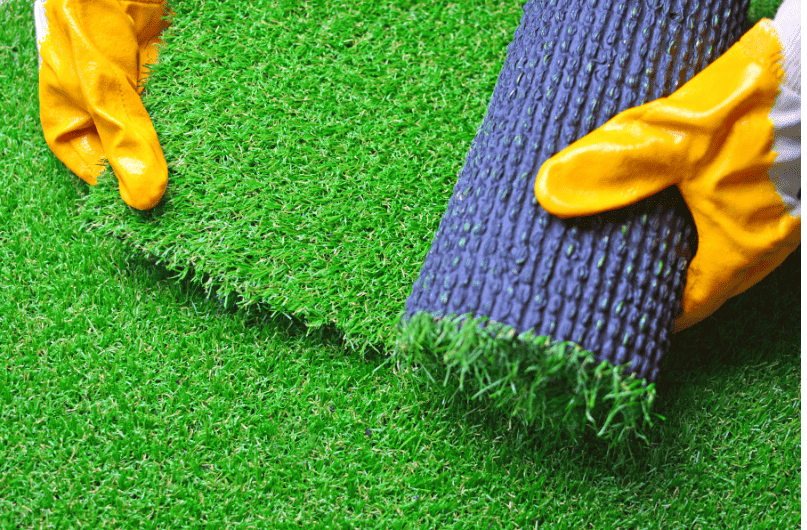
When selecting artificial grass for your home, it's important to look at a few key factors to ensure you choose a high-quality product.
Pile Height and Density
Pile height refers to the length of the grass blades and pile density is how close together the blades are. For residential use, look for pile heights between 20mm and 40mm for a natural look. The pile density should be high, around 70 ounces per square meter, so the blades stand up properly and feel plush underfoot. Higher pile height and density equals a fuller, more luxurious lawn.
Backing and Drainage
Quality artificial grass has strong backing to provide stability and drainage. Polypropylene backing is durable and allows water to flow through. A permeable backing prevents water pooling on the surface. Some options also have a latex coating for additional strength and stability.
Reliable Service
At Real Landscaping, we provide more than just quality turf. Our comprehensive service guarantees a seamless experience from the beginning to the end. From helping you choose the right product to expert installation services, we ensure complete customer satisfaction. We support you through each step of the process, with a dedicated team to answer your queries and facilitate your decisions. Our goal is to make sure your new artificial lawn not only matches but exceeds your expectations.
As you compare various products, always check that the pile height, density, and service quality cater to your needs. Opting for the highest quality materials complemented by professional service will make sure your new artificial lawn maintains its beauty for several years.
Safety Considerations with Artificial Grass
Installing artificial grass is a great way to transform your outdoor space, but there are some safety considerations to keep in mind. Proper installation is key to avoiding hazards.
Proper Base Preparation
Artificial grass requires a base layer of compacted gravel to allow for drainage. This base needs to be properly leveled and compacted. An uneven base can lead to bumps or depressions in the artificial turf that could cause tripping hazards. Take care to prepare the base thoroughly.
Adequate Drainage
Standing water under artificial grass can lead to bacterial growth and a foul odor. Plus, water pooling can cause the turf to shift or stretch. Proper drainage is a must, including grading the area away from the house and installing a French drain system if needed. No shortcuts here.
Supervision for Kids and Pets
Artificial grass gets extremely hot in the sun and retains heat. Always supervise small children or pets on artificial lawns on hot days to avoid burns. Synthetic turf also won't provide the same cushion as real grass, so increased risk of injuries from falls is possible. Close supervision is key.
With some smart preparation and care, artificial grass can be a safe addition to enhance your outdoor living space. Just remember to account for proper installation, drainage, and supervision when using your new synthetic lawn.
Alternatives
While artificial grass offers many benefits, it's not the only option for your lawn. Here are some alternatives to consider:
Natural Grass
Natural grass remains a popular choice for lawns and landscapes. With proper care and maintenance, real grass can be lush, green, and beautiful. The feel of walking barefoot on natural grass can't be replicated by artificial turf.
However, real grass does require more work than fake grass. It needs regular mowing, watering, fertilizing, aerating, and weeding. Natural grass goes dormant and turns brown during cold winter months. It can also become patchy if it doesn't get enough sun, water, or care.
Other Landscaping Options
If you want a lower maintenance alternative to natural grass, consider options like:
- Drought-tolerant plants - Native plants suited to New Zealand's climate require less watering once established. Popular options include lavender, rosemary, succulents, flax, and silver tussock grasses.
- Hardscaping - Materials like pavers, pebbles, gravel, mulch, and decorative rocks create an attractive landscape with minimal upkeep.
- Deck or patio - These provide usable outdoor living spaces without any lawn.
- Vegetable or herb garden - Grow your own produce and herbs in planted garden beds.
Consider Your Needs
Think about your lifestyle, budget, and goals for your landscape. Artificial grass offers convenience but has upfront costs. Other options like native plants or hardscaping may require more planning and work initially but have lower long-term maintenance. Consider all the alternatives to find the best landscape solution for your home.
Conclusion
In summary, artificial grass provides several key benefits for home owners in New Zealand. The most significant advantages are the cost savings from reduced water usage, easier maintenance without mowing or fertilizers, and the ability to enjoy a lush green lawn year-round regardless of weather conditions.
Artificial turf allows you to reclaim outdoor space that would otherwise be unusable during dry periods. It stays permanently green and doesn't require the time-consuming upkeep that natural grass does. Installation is relatively straightforward as well.
While real grass has its appeal, artificial alternatives have improved dramatically in look and feel. The newest synthetic grass mimics natural turf in appearance but without any of the hassles. It's pet-friendly, child-safe, and allows outdoor play space even when natural lawns dry out.
For New Zealanders wanting to reduce lawn care duties and water usage while gaining a pristine lawn that maximizes usable backyard area, artificial grass is an excellent solution. With the many types now available, you can find an artificial turf perfect for your home's needs and environment. Artificial grass allows you to enjoy the beautiful aesthetic of a lush lawn every day of the year.
Hydroseeding, also known as hydraulic mulch seeding, is a planting process that uses a slurry of seed and mulch that is sprayed across an area to help establish vegetation cover. Hydroseeding is an easy, fast, and effective way to sow grass seed and create a lush lawn or restore vegetation.
Hydroseeding was originally developed in the 1950s as a way to quickly re-vegetate large areas and control soil erosion on construction sites, highways, and mining operations. It has since become a popular lawn care method used by homeowners and landscapers for establishing new lawns or overseeding existing turf.
The main benefits of hydroseeding include:
- Speed and efficiency - Hydroseeding can cover up to an acre per hour, allowing large areas to be seeded quickly. The process is much faster than traditional seeding methods.
- Uniform coverage - The slurry is sprayed evenly across the area, ensuring the seed makes consistent contact with the soil. This leads to uniform germination and growth.
- Increased germination - The wood fiber mulch retains moisture and protects the seeds, improving germination rates compared to bare seeding.
- Erosion control - The mulch and tackifier ingredients provide immediate erosion protection for slopes and bare soil.
- Convenience - No need to till, rake or prepare the seed bed. Hydroseeding can be done over existing soil or vegetation.
- Cost-effective - Hydroseeding is cheaper compared to sodding large areas. The process and materials used make it an affordable lawn establishment method.
With its speed, effectiveness and ease of use, it's no wonder hydroseeding has become the preferred method for creating beautiful lush lawns in New Zealand.
When to Use Hydroseeding
Hydroseeding is a great option for establishing a new lawn or repairing patches in an existing lawn. The key advantages of hydroseeding make it ideal in the following situations:
New Lawns
Hydroseeding is a fast, efficient way to seed a new lawn. It allows you to distribute grass seed, fertilizer, and mulch over a large area in one application. Hydroseeding ensures even coverage and good seed-to-soil contact for maximum germination. This method saves significant time compared to seeding a new lawn manually. Hydroseeding establishes lawn grass quicker with less effort on bare soil or new construction sites.
Patching Existing Lawns
Damaged or thin areas in an existing lawn can be filled in quickly with hydroseeding. It provides an easy way to re-seed bare or sparse patches without digging up and re-sodding sections. Hydroseeding also blends the patch with the surrounding lawn for a seamless appearance once the new grass grows in. This is faster and less labor-intensive than manual patching or sodding.
Erosion Control
The grass seed, mulch, and tackifier in a hydroseeding mix help stabilize soils on slopes or banks. The mulch holds moisture and the tackifier binds everything together to prevent erosion and runoff until grass plants establish roots. Hydroseeding steep banks, construction sites, or roadsides provide an erosion control layer that also turns into an attractive green lawn. The grassroots secure the soil in place.
Hydroseeding Process Step-by-Step
Hydroseeding is actually a simple process that can help you get a lush new lawn started. Here are the basic steps:
Site Preparation
Proper site preparation is crucial for hydroseeding success. First, remove any existing vegetation from the area, along with rocks and debris. Use a rototiller or similar equipment to loosen the top 2-3 inches of soil, which allows the hydroseed mix to penetrate deeply. Grade and shape the area to allow for proper drainage.
Mixing the Slurry
Mix the hydroseed mulch, seed, fertilizer, and other amendments with water in a hydroseeding machine to create a nutrient-rich slurry. The mulch acts as a tackifier to help the slurry stick to the soil surface. Mix it according to the manufacturer's specifications.
Applying the Hydroseed
Use the hydroseeding equipment to spray the slurry uniformly across the prepared area. Apply in multiple directions to ensure even coverage. The slurry layer should be 1/8 to 1/4 inches thick when dry. Don't hydroseed before rain, and protect newly hydroseeded areas from heavy rain to avoid washout.
Caring for the New Lawn
Keep the area moist for 2-3 weeks after hydroseeding to ensure proper germination. Water lightly 2-3 times per day if there's no rain. Once sprouts emerge, water more deeply but less frequently. Mow once the grass is 3 inches tall, and fertilize 4-6 weeks after germinating.
Proper hydroseeding technique and aftercare results in a lush, even, weed-free lawn. It's an easy way to establish turf grass quickly.
Choosing the Right Hydroseed Mix
The hydroseed mixture is key to getting a lush, green lawn from hydroseeding. The slurry sprayed onto your lawn contains four main ingredients:
Grass Seeds
Select a grass seed mix suitable for your climate and sunlight conditions. In New Zealand, a blend of ryegrass and fescue is commonly used. Make sure to use a mix formulated for lawns, with fine and dwarf cultivars. The seed mix should contain at least three grass species for resilience.
Fertilizer
Fertilizer provides essential nutrients to help the grass seeds germinate and establish. Look for a starter fertilizer high in phosphorus to promote root growth. Slow release nitrogen is also important for sustained growth. The fertilizer concentration can range from 10-15 pounds per 1000 sq ft.
Mulch
Wood fiber mulch in the hydroseed mix helps retain moisture and protects the grass seeds. It also anchors the seeds in place so they don't wash away. Use premium virgin wood mulch for the best results. The mulch is mixed as a loose cellulose fiber or more processed for better suspension.
Tackifier
A tackifier or soil binder is essential for the hydroseed mix to properly adhere to the soil surface. Natural guar gum tackifiers derived from plant sources are commonly used. They stick the slurry mix together and bond it to the soil. The tackifier concentration can range from 50-100 pounds per acre.
Choosing the right blend of these four ingredients is crucial for proper germination and establishment of a healthy, lush lawn from hydroseeding. Work with an experienced hydroseeding contractor to select the right mix for your property's specs.
Hydroseeding Equipment Needed
Hydroseeding requires some specialized equipment to get the hydroseed mixture properly applied to the lawn area. Here are the key pieces of equipment you'll need:
Hydroseeder Machine
The hydroseeder machine is the main piece of equipment. It's essentially a tank that can hold 500-1500 gallons of the hydroseed slurry mixture. The tank has an agitator that keeps the mixture blended and a pump to spray the slurry out through the hose and nozzle. Hydroseeders can be self-propelled or pulled behind a truck.
Some key features to look for in a hydroseeder include:
- Large tank capacity
- Powerful pump and agitator
- Ability to spray long distances
- Good maneuverability
Professional landscapers often use trailer-mounted hydroseeders that can be pulled behind a truck. DIYers can rent smaller, more affordable hydroseeder models.
Hoses
The hydroseeder will have a heavy-duty hose attached to the slurry tank to direct the spray. Look for hoses that are flexible but durable and resistant to kinks. Hose length can vary from 15-60 meters. Make sure to get a hose long enough to easily reach all parts of your lawn.
Nozzles
Nozzles are attached to the end of the hose to fan out the hydroseed spray evenly across the lawn. Look for nozzles made of brass, stainless steel or heavy-duty polymers. The nozzle's fan angle and flow rate can be adjusted for different spraying needs. Wider fan angles (40-50 degrees) are good for broad coverage.
Some nozzles have a hydraulic atomizing manifold that mixes the slurry with water for a more uniform spray. Interchangeable nozzles allow switching between spray patterns.
Having the right hydroseeding equipment will make the job much easier and help ensure an even application of slurry over the lawn area for optimal germination and growth. Investing in quality equipment is worth it for a lush, beautiful lawn.
Estimating Hydroseeding Costs
Hydroseeding costs vary depending on factors like your lawn size, site conditions, and materials used. However, you can estimate costs by following these steps:
Calculate the area to be hydroseeded in square meters. Measure the length and width of the area and multiply to find the total square meters. Be sure to include any sloped areas and odd shapes. Most contractors charge by the square meter.
Estimate cost per square meter. In considering the cost per square meter for hydroseeding, take note of the varying factors that can affect this figure. Basic grass seed mixtures with mulch and tackifier may sit at the lower end of the cost range, while specialized mixtures using fertilizer could have a higher price per square meter.
Multiply area by cost per sqm for a total estimate. Multiply the calculated area by the estimated cost per square meter to arrive at a total cost estimate. This figure should encompass both materials and labor.
To finalize your budget, obtain quotes from at least 2-3 reputable hydroseeding contractors. These quotes should account for your lawn's specific details, including any necessary extra site prep work (such as grading or adding topsoil). With an accurate measurement of the area and an estimated cost per square meter, you can establish a reasonable budget for your hydroseeding project.
Hydroseeding vs Sod vs Seeding
Hydroseeding, sod, and seeding are three popular lawn installation methods, each with their own pros and cons. Here's how they compare:
Cost
Generally considered an economical solution for establishing or overseeding a lawn, hydroseeding sits as a mid-range option in terms of cost. The pricing, though varying, makes it a popular choice for its balance between affordability and effectiveness.
Sod is typically the more expensive option for lawn installation. Professionally grown and cut into turf blocks, it offers an 'instant lawn' which justifies its higher expense. The costs can vary depending on the type of grass and the quality of the sod.
Seeding is the most cost-effective approach to establishing a new lawn. However, it demands a substantial amount of time and effort, both for installation and ongoing maintenance. The low initial cost comes with a trade-off in terms of manual labor and time for the lawn to fully establish.
Appearance
- Hydroseeding produces a lush, even lawn in a short timeframe. The grass establishes quickly, within 2-3 weeks when properly cared for.
- Sod offers instant gratification, with a full lawn ready immediately upon installation. The results are seamless and uniform.
- Seeded lawns take 1-2 months to fully establish. The grass emerges slowly and unevenly at first, requiring consistent watering and care.
Installation
- Hydroseeding is quick, easy, and minimally disruptive. The hydroseed mixture is simply sprayed over the prepared area in liquid form. No digging or soil disruption is required.
- Sod installation is labor-intensive. The heavy sod rolls must be lugged, positioned, seamlessly abutted, and rolled to ensure proper contact with the soil beneath.
- Seeding a lawn requires careful soil preparation, planning, and consistent watering. However, the seeds are easily spread using a spreader.
In summary, hydroseeding offers a good middle-ground with affordable costs and relatively fast, uniform results compared to sod and seeding. It's an ideal solution for large areas or slopes that would be difficult to sod or seed.
Maintenance Tips
After hydroseeding, proper lawn care and maintenance is crucial for nurturing the new grass and achieving a lush, healthy lawn. Here are some key maintenance tips:
Watering
- Water daily for 2-3 weeks after hydroseeding to keep seeds moist. Light, frequent watering is best to avoid runoff.
- After grass sprouts, begin to taper off watering but continue deep soakings 1-2 times per week for the first month.
- Established lawns need about 1 inch of water per week from rain or irrigation. Adjust as needed based on weather.
Mowing
- Begin mowing once the new grass reaches 3-4 inches tall. Cut no more than 1/3 of the blade height at a time.
- For the first month, mow with sharp blades set at the highest setting - around 4 inches.
- Gradually lower the height for subsequent mowings down to your desired length, usually 2-3 inches.
Overseeding
- Plan to overseed thin or bare spots about 6-8 weeks after hydroseeding.
- Use the same seed mix as the original hydroseeding for best results.
- Lightly rake area, sow seed, and keep moist until germination.
Weed Control
- Hand pull weeds as soon as you notice them to prevent spreading.
- Once established, apply pre-emergent in early spring to prevent summer weeds.
- Spot treat weeds as needed with selective herbicides. Take care not to damage desired grass.
Following these best practices for water, mowing, overseeding, and weeds will ensure your newly hydroseeded lawn thrives. Proper maintenance leads to a lush, green, and healthy lawn for years to come.
Troubleshooting Hydroseeding Issues
Hydroseeding is a great way to establish lush grass quickly, but it doesn't always go perfectly. Here are some common issues and how to address them:
Patchy Germination
It's normal to see some patchiness as the grass starts to grow. But if large areas are remaining bare after 4-6 weeks, it likely indicates an issue with germination. This could be due to:
- Poor seed-to-soil contact - Hydroseeding can struggle on steep slopes where slurry runs off before seeds adhere properly. Hand seed any missed patches.
- Insufficient watering - Ensure new grass gets 1-2cm of water 2-3 times per week to support germination. Avoid runoff.
- Too much shade - Grass needs at least 4 hours of direct sun daily. Thin trees or consider shade-tolerant grass varieties.
- Poor timing - Avoid hydroseeding in cold weather when grass won't germinate well. Spring and fall are ideal.
Erosion
It's normal to see some minor erosion after hydroseeding until the grass takes root. But heavy runoff indicates a problem. Try:
- Applying a tackifier in the hydroseed mix to help bind seeds and soil.
- Using erosion control blankets on steep slopes to hold slurry in place.
- Reseeding washed out areas once rains have passed.
- Adjusting sprinklers to deliver gentle, dispersed watering, avoiding heavy runoff.
Weed Growth
Some weeds are inevitable, but major weed patches indicate issues. Tackle weeds by:
- Mowing regularly once the grass reaches 10cm tall. This discourages weed growth.
- Overseeding bare patches aggressively to crowd out weeds.
- Spot spraying or hand pulling persistent weeds.
- Using pre-emergent weed control products at seeding time.
- Topdressing with extra hydroseed mix to thicken up sparser areas prone to weeds.
With attentive care during establishment, hydroseeding can still deliver a lush, beautiful lawn even if a few issues pop up along the way. Don't hesitate to re-treat any problem spots. With a bit of patience and TLC, you'll achieve a flawless carpet of grass.
Finding a Hydroseeding Contractor
When it's time to hydroseed your lawn, finding the right contractor is key to getting the lush green lawn you desire. Here are some tips for finding and selecting a qualified hydroseeding contractor:
Check for Proper Licensing
Make sure any contractor you consider is properly licensed for hydroseeding services in your state/region. They should carry liability insurance as well. Don't be afraid to ask to see their license and proof of insurance before hiring.
Look for Experience
Find a contractor that specializes in hydroseeding and has several years of experience providing this service. They will understand how to create the optimal hydroseed mix and apply it correctly for your climate and yard conditions. Ask to see examples of their past hydroseeding work.
Review Examples of Their Work
A reputable hydroseeding contractor should have a portfolio of completed hydroseeding projects you can look at. Seeing photos of their previous work will give you a good idea of their skill and the quality results they can deliver. Make sure their past projects are similar to your lawn size and scope.
Get a Detailed Estimate
Have the hydroseeding contractor provide a written estimate outlining exactly what services, materials, and costs will be included. Get quotes from at least 2-3 contractors and compare. Avoid contractors that are significantly lower priced than competitors.
Check Reviews and References
Find online reviews of the contractor and ask for references you can contact. Speaking with past customers will provide insight into their service, professionalism, and the results they provided. Good contractors should have multiple positive reviews and be willing to connect you with satisfied customers.
Following these guidelines will definitely steer you in the right direction for your hydroseeding needs. Don't gamble with the health of your lawn; rather, entrust it to Real Landscaping, where we promise to convert your barren patch into a lush green lawn, preparing you for compliments from your neighbors. Ready to make your dream lawn a reality? Contact us today and begin your journey towards the perfect lawn.
Hydroseeding FAQs
What is the ideal time of year for hydroseeding in New Zealand?
The best time for hydroseeding is during the warmer months from spring through autumn. Avoid hydroseeding in winter when grass seeds will struggle to germinate and establish due to cold temperatures and less sunlight. Spring and autumn are ideal times, as the cooler temperatures and rain help seeds germinate.
How long does it take for hydroseed to grow?
It usually takes 7-21 days for the first signs of germination to appear after hydroseeding. Full grass establishment takes 6-8 weeks. Proper watering and fertilization during this time is crucial. Avoid mowing new hydroseeded lawns for at least 4 weeks after sprouting.
Does hydroseeding require special lawn care?
Hydroseeding does require vigilant watering 1-2 times daily to keep seeds moist for 2-3 weeks after application. After sprouts appear, water deeply 2-3 times a week. Fertilize with a starter fertiliser 2-4 weeks after sprouting and mow once the grass is 4+ inches tall.
How long does a hydroseeded lawn last?
With proper maintenance and care, a hydroseeded lawn can last for many years. Hydroseeding uses the same types of grass seeds that are used when sowing lawns by traditional methods. Reseeding or overseeding may be needed periodically to fill in bare spots.
Is hydroseeding expensive?
Hydroseeding typically costs $1,000-$1,500 for a standard residential lawn of 2,000-3,000 sq ft. Hydroseeding is generally more expensive than traditional seeding but requires less intensive labour. Get quotes from several hydroseeding professionals.
What maintenance is needed after hydroseeding?
Frequent watering, fertilizing, mowing, overseeding as needed, and addressing drainage issues will help maintain a hydroseeded lawn. Aerate compacted areas. Overseed bare or thin spots. Mow to the proper height for the grass species. Remove debris and reapply hydroseed to areas of erosion.
How long should I wait to mow a newly hydroseeded lawn?
Wait at least 4 weeks after the grass sprouts to mow a new hydroseeded lawn. Let the grass grow to around 4 inches before the first mowing. After that, maintain proper mowing height for the type of grass. Never cut off more than 1/3 of the grass blade height when mowing.
Can I hydroseed an existing lawn or bare spot?
Yes, hydroseeding is an effective way to overseed and thicken up an existing lawn, bare patches, or areas damaged by pet urine spots. Mow the existing lawn short, rake to remove dead material, then hydroseed.
What mistakes should I avoid with hydroseeding?
Avoid improper watering, poor timing, using low quality hydroseed mix, inadequate site prep, lack of fertilizer, and mowing too soon. Also, don't hydroseed on windy days when the slurry can blow away before seeds adhere. Carefully follow all preparation and aftercare steps.
Landscaping is an art that doesn't stop at creating an attractive design; it’s also about the ongoing care and maintenance that keeps your garden vibrant and healthy. Landscape maintenance is critical to preserving the value and beauty of your property. In the diverse climates of New Zealand, this requires specific understanding and knowledge.
A well-maintained garden not only enhances your home's curb appeal but also creates an inviting space for relaxation and outdoor entertainment. From planting to pruning, watering to weed control, maintaining a garden can be a rewarding experience. This guide offers a comprehensive overview of the crucial aspects of landscape maintenance in New Zealand.
Recognizing the importance of garden landscaping can shape your approach to your outdoor spaces. With regular care, you can maintain the aesthetic of your landscape design, ensuring it continues to be a source of pleasure and pride. Let's explore the elements of landscape maintenance in more detail.
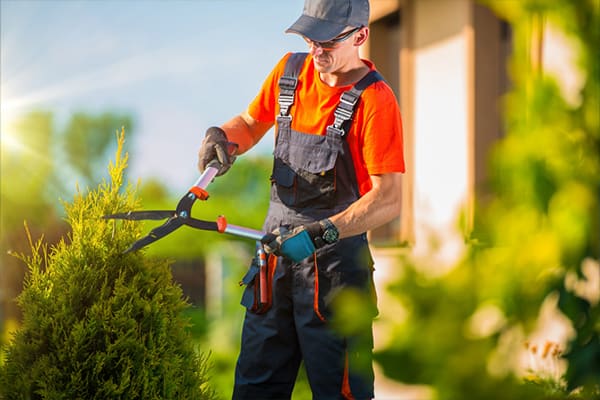
Understanding Your Garden's Needs
Every garden is unique, and as such, has its own specific needs. Various factors such as the types of plants, the quality of the soil, and the local climate in New Zealand will all influence your garden's care requirements. Understanding these factors can help you develop a landscape maintenance plan that meets the needs of your garden and ensures its ongoing health and vitality.
Whether you're doing the landscaping yourself or employing the services of a professional landscaper NZ, having a solid grasp of your garden's needs can lead to a more effective and efficient maintenance routine. It allows you to provide targeted care, which can result in a more resilient and thriving garden.
Moreover, understanding your garden’s needs can help you make the most of your outdoor space. Whether it’s knowing when to water, how to nourish your soil, or the optimal times for planting and pruning, this knowledge can transform your garden landscaping endeavors.
Seasonal Landscape Maintenance
In New Zealand, just like anywhere else, different seasons bring different landscape maintenance tasks. Spring is the season of growth and renewal, making it the perfect time for tasks like pruning, planting, and preparing your garden beds. As the weather heats up in summer, you may need to adjust your watering schedule, apply mulch to retain soil moisture, and implement pest control measures.
Autumn is a good time to prepare your garden for the colder months ahead. This could involve raking leaves, winterizing your irrigation system, and planting trees or perennials. During winter, while your garden may not be in full bloom, there are still maintenance tasks to undertake. Protecting your plants from frost, cleaning and servicing your gardening tools, and planning for spring are all key winter tasks.
By understanding and planning for these seasonal tasks, you can ensure that your garden remains well-maintained throughout the year. This proactive approach can also help to prevent issues before they arise, keeping your landscape design looking its best in all seasons.
Plant Care
Proper plant care is crucial for maintaining a vibrant and healthy garden. This encompasses several tasks, including regular watering, appropriate fertilizing, and timely pruning. Different types of plants will have varying care requirements, and these needs can change with the seasons. In particular, native New Zealand plants can have specific care needs, and understanding these will be vital to their survival and growth.
Regular watering is one of the most essential tasks in plant care. However, it’s not just about providing water; it’s about watering efficiently and effectively. This means watering deeply but infrequently, to encourage the development of strong root systems. The timing of watering can also impact your plants’ health. Early morning is generally the best time to water as it reduces evaporation and allows plants to take up water before the heat of the day.
Fertilizing provides your plants with the nutrients they need to grow strong and healthy. However, it's important to use the right type of fertilizer at the right time to avoid damaging your plants. Pruning, on the other hand, helps to maintain the shape of your plants, promotes growth, and can prevent disease and pests. Consulting with a professional landscaper NZ can provide tailored advice on plant care for your specific garden.
Lawn Care
A well-maintained lawn can greatly enhance the aesthetic appeal of your home. Key aspects of lawn care include regular mowing, appropriate watering, aeration, and fertilization. By understanding and implementing these tasks, you can maintain a lush, green lawn that serves as a beautiful centerpiece for your landscape design.
Mowing is more than just cutting your grass; it's a vital task that impacts the health and appearance of your lawn. Regular mowing helps to keep your grass at an optimal height, which promotes healthier growth. Watering your lawn is also crucial, but like plant watering, it's not just about quantity; it's also about timing and method. Early morning watering allows the water to soak into the soil before it can evaporate in the heat of the day.
Aeration and fertilization are two other essential tasks in lawn care. Aeration involves puncturing small holes in your lawn to allow air, water, and nutrients to penetrate the grass roots. This helps the roots to grow deeply and produce a stronger, more vigorous lawn. Fertilization provides your lawn with the nutrients it needs to be healthy, strong, and green. Employing professional hydroseeding NZ services can provide efficient, even coverage of your lawn area, ensuring optimal growth and health.
Hardscape Maintenance
Hardscape elements like patios, walkways, masonry work and retaining walls add structure and functionality to your landscape design. While these elements can be highly durable, they're not completely maintenance-free. Regular cleaning can keep your hardscape elements looking their best, while repairing any damage promptly can prolong their lifespan.
In addition to cleaning and repairs, preparing your hardscape for seasonal changes is a vital task in landscape maintenance. This might involve sealing your patio or deck before winter to protect it from moisture damage or clearing leaves and debris from your walkways in autumn to prevent slipping hazards.
Proper maintenance of your hardscape elements is essential to maintaining the overall aesthetic and functionality of your garden. Whether it's regular cleaning, timely repairs, or preventative measures, these tasks all contribute to the longevity and appeal of your hardscape elements. If you're unsure about how to maintain your hardscape, consider consulting with a professional landscaper NZ.
Pest and Disease Control
Pests and diseases can pose a significant threat to the health and beauty of your garden. As part of your regular landscape maintenance routine, it's important to check your plants for signs of pests or disease. Early detection is key to effective control and can prevent minor issues from becoming major problems.
Common pests in New Zealand gardens include aphids, snails, and whiteflies, while common diseases might include powdery mildew, root rot, or rust. Each of these pests and diseases will require different control methods. It's important to use eco-friendly options wherever possible to protect both your garden and the environment.
Prevention is often the best approach to pest and disease control. This can include practices such as maintaining healthy soil, choosing disease-resistant plant varieties, and encouraging beneficial insects into your garden. A professional landscaper NZ can provide expert advice.
Irrigation System Maintenance
Irrigation is an essential aspect of any thriving garden. A well-maintained irrigation system ensures your plants receive the correct amount of water, promotes healthy growth, and conserves water resources. Regular checks and adjustments to your irrigation systems NZ are crucial to keep them functioning efficiently.
The first step in maintaining an irrigation system is to check for leaks or malfunctions. Even minor issues can lead to water wastage or insufficient watering of your plants. Regular checks during watering times can help detect and resolve issues promptly.
The type of irrigation system you use will influence the specific maintenance tasks required. For example, drip irrigation systems may need periodic cleaning of emitters or replacing of parts, while sprinkler systems may require adjustment of sprinkler heads to ensure even water distribution.
Regardless of the type of system you use, winterizing your irrigation system is a crucial maintenance task in colder regions of New Zealand. This involves draining the system and protecting it from freezing temperatures to prevent damage. Professional irrigation systems NZ services can assist with system installation, maintenance, and winterization tasks, providing expert care for your watering needs.
Sustainability in Landscape Maintenance
Sustainability is a growing trend in landscape maintenance. It's not only about being environmentally friendly; it's also about creating a garden that is easy to maintain and cost-effective. From water conservation methods to composting and using native plants, there are many ways to incorporate sustainability into your garden landscaping.
Water conservation can be achieved through efficient watering methods, installing a rainwater harvesting system, or using drought-tolerant plants in your landscape design. Composting is another excellent way to improve your garden's sustainability. It not only reduces the amount of organic waste going to landfill but also provides a rich, natural fertilizer for your garden.
Choosing to plant native New Zealand plants in your garden is another sustainable practice. Native plants are adapted to the local climate and soil conditions, making them easier to maintain and less reliant on additional watering and fertilizing.
By implementing sustainable practices, you can create a garden that is not only beautiful and easy to maintain but also contributes to the health of the environment. If you're looking to create a sustainable garden, a professional landscaper NZ can provide expert advice and assistance.
Hiring a Professional for Landscape Maintenance
While some homeowners enjoy the hands-on experience of maintaining their garden, there are a wealth of benefits to hiring a professional landscape company in New Zealand. A professional landscaper NZ can provide a range of services, from routine maintenance tasks to specialized services such as hydroseeding NZ.
Professional landscapers bring a wealth of knowledge and experience to your garden. They understand the specific needs of New Zealand plants and gardens, ensuring your garden gets the best care possible. Whether you need assistance with regular maintenance tasks or require more specialized services, a professional can help.
Hiring a professional can also save you time and effort. They can take care of tasks like mowing, pruning, fertilizing, and pest control, freeing up your time for other activities. Additionally, professionals have access to specialized equipment and materials, which can lead to better results and a more beautiful garden.
Whether you choose to do the work yourself or hire a professional, regular landscape maintenance is key to maintaining a beautiful and healthy garden. With the right care, your garden can become a source of pride and enjoyment, a place to relax and enjoy the outdoors.
Conclusion
Landscape maintenance is an ongoing process, requiring time, effort, and a keen understanding of your garden's needs. From the basics of plant care to the complexities of irrigation systems NZ, each task contributes to the health and beauty of your garden.
Whether you're new to garden landscaping or an experienced gardener, there is always something more to learn. By continuously learning and applying new practices, you can enhance your skills and the quality of your garden.
Remember, while maintaining a garden can be a lot of work, it's also a rewarding experience. Seeing your plants thrive and your garden flourish is a pleasure like no other. And if you ever need help, don't hesitate to reach out to a professional landscaper NZ. They can provide the expertise and services needed to keep your garden at its best.
Need Help with Your Garden Maintenance?
Are you ready to take the next step in your landscape maintenance journey? Don't hesitate to reach out to a professional landscape company for advice or assistance. The best way to get started is to reach out to Real Landscaping. We'll help connect you with the landscaping contractor that you need to get the job done right. All of our landscaping contractors adhere to local NZ landscaping guidelines and possess a wealth of expertise. Click here to get started.

